> ## Documentation Index
> Fetch the complete documentation index at: https://developers.criteo.com/llms.txt
> Use this file to discover all available pages before exploring further.

# OAuth App - Authorization Code Setup

> This guide provides step-by-step instructions on setting up an API application using the authorization code workflow

<Info>
  This guide describes OAuth App setup using the Authorization Code flow.
  If your application is a mobile app, single-page app (SPA), or other public client that cannot securely store a client secret, you must use the [Authorization Code with PKCE](/retail-media/docs/oauth-app-authorization-code-pkce-setup) instead.
</Info>

***

# Setting up an authorization code application

## Step 1. Authorization Code Setup

### Creating an authorization code app

Log in to the Criteo Partners Portal and create a new app by clicking the ➕ button in the `My apps` section.

<Frame>
  <img src="https://mintcdn.com/criteo-e1682996/xLJjp01XGpYNB6pV/images/retail-media/v2025.10/docs/862451e-image.png?fit=max&auto=format&n=xLJjp01XGpYNB6pV&q=85&s=c01c841b0ae72a9c6b5f9eceac27ad38" alt="862451e image" width="1852" height="725" data-path="images/retail-media/v2025.10/docs/862451e-image.png" />
</Frame>

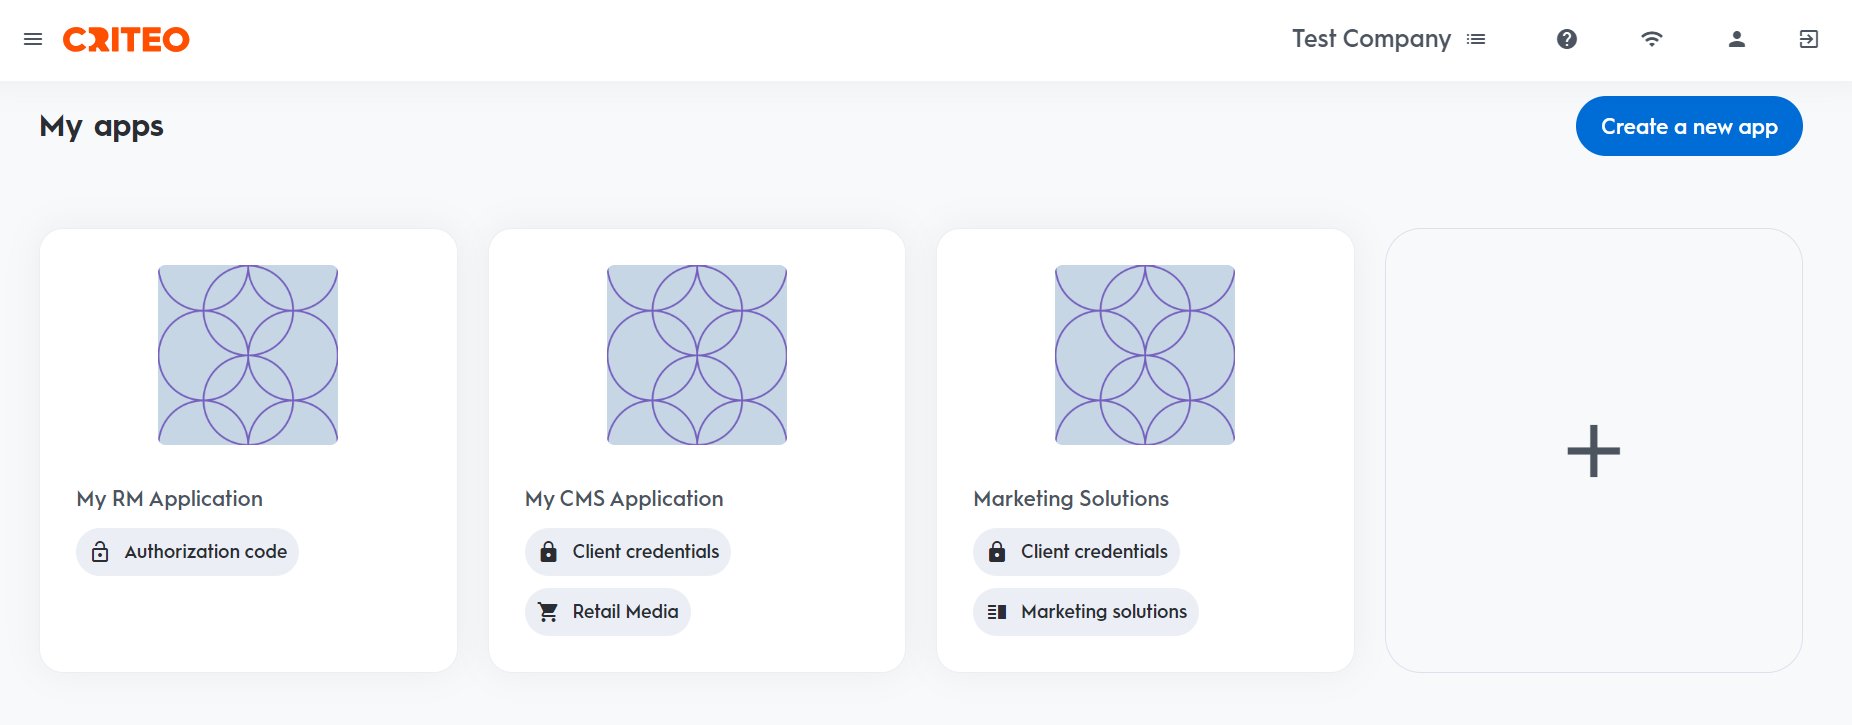
This will open a modal where you can select type of application.

***

### Create app

#### App details

* Provide your app name and description. Optionally, add an image to identify your application.
* On your app page, you can define the scope of your application and OAuth parameters. For more details, please refer to [Getting connected to the API](/retail-media/v2025.10/docs/connect-to-the-api).

<Frame>
  <img src="https://mintcdn.com/criteo-e1682996/xLJjp01XGpYNB6pV/images/retail-media/v2025.10/docs/abc222c-portal-_step1_1.gif?s=536d681b4574e12340ad1122c19d90fd" alt="abc222c portal _step1_1" width="1896" height="750" data-path="images/retail-media/v2025.10/docs/abc222c-portal-_step1_1.gif" />
</Frame>

***

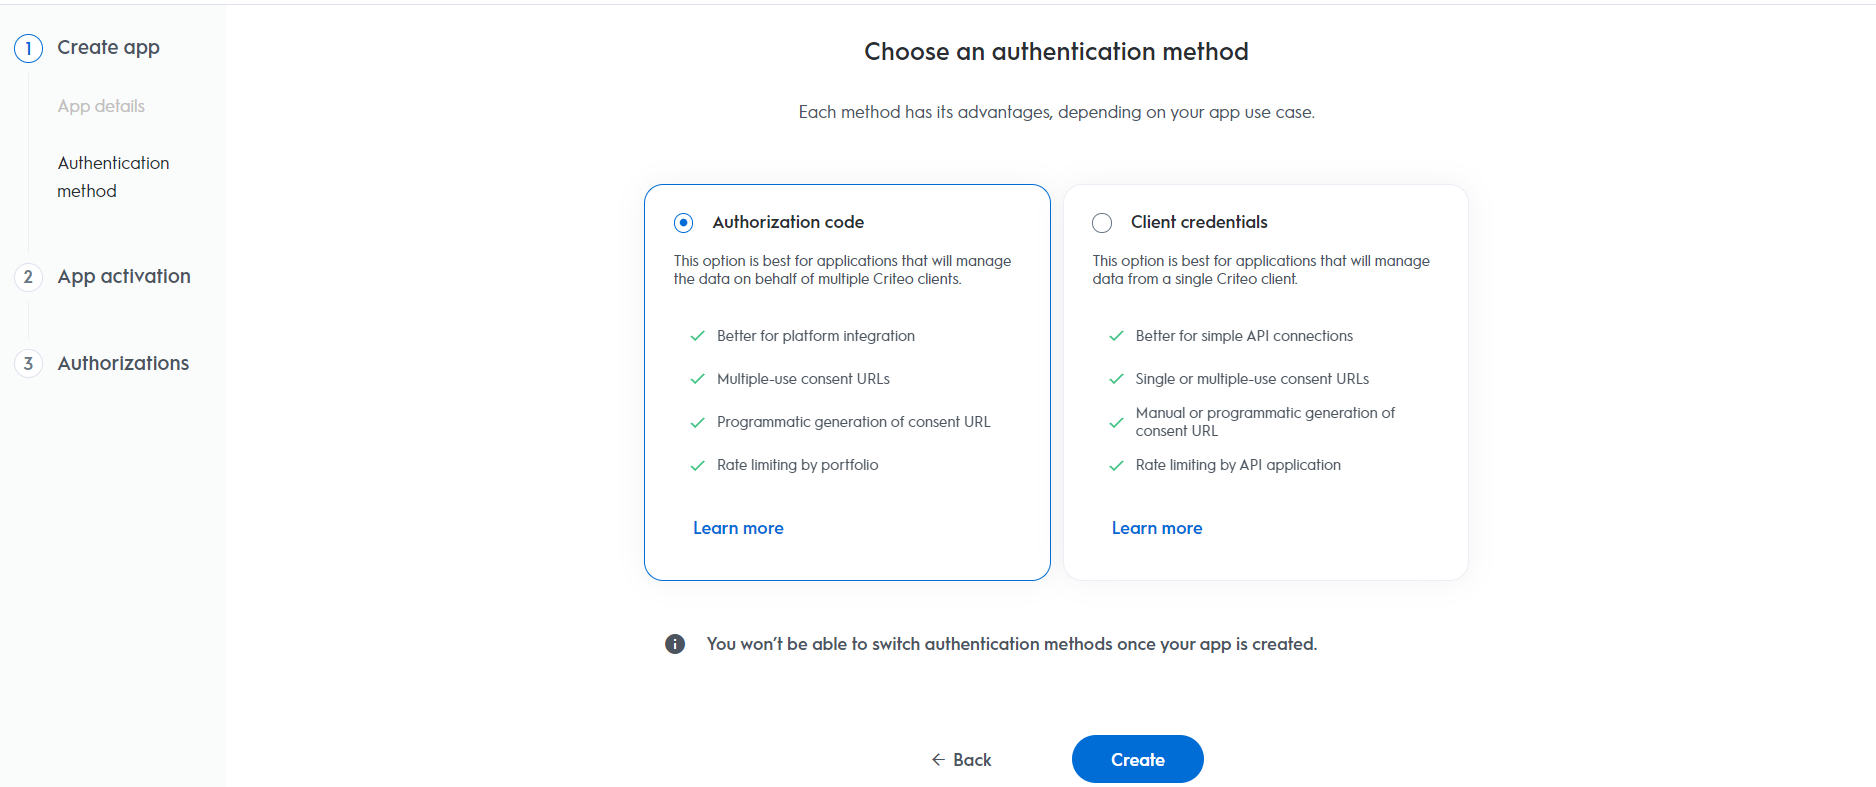
#### Authentication method

* Select your app's authentication method: choose between "*Client Credentials*" or "*Authorization Code*".
* For this setup, we are selecting "*Authorization Code*", but you can review our [OAuth App implementation](/retail-media/v2025.10/docs/oauth-app-implementation) guide to determine the best option for your organization.
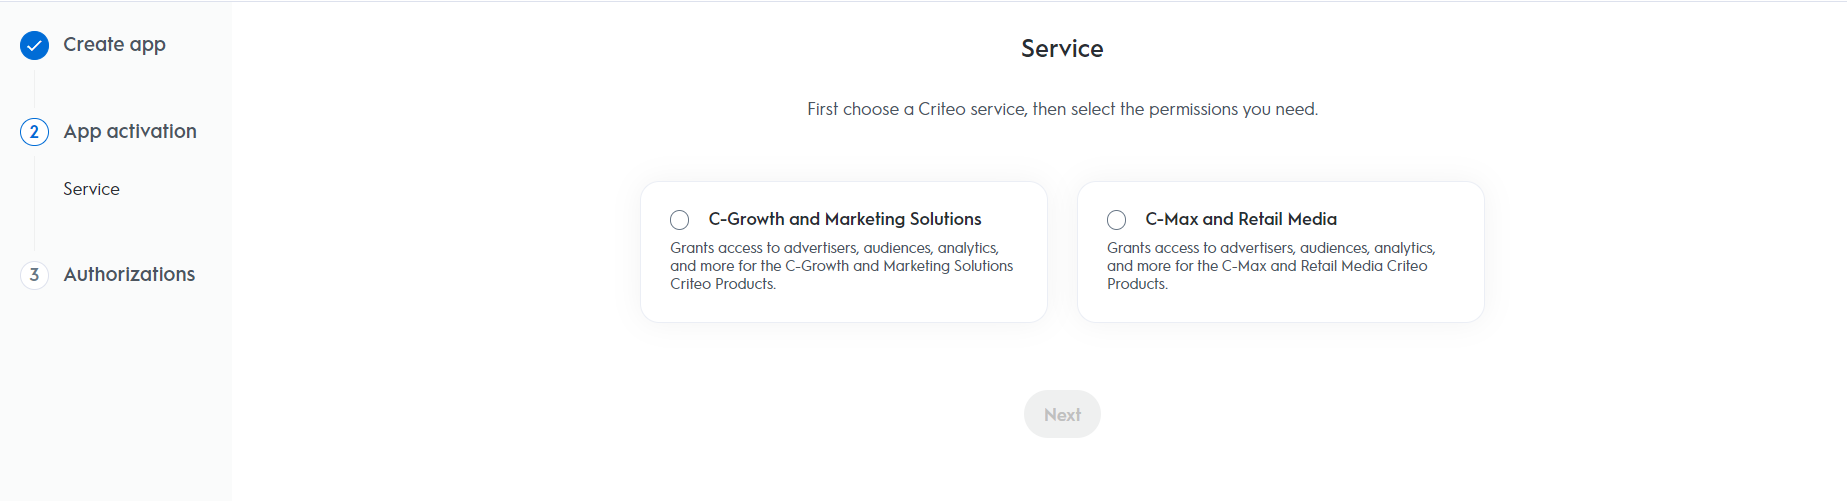
<Frame>
  <img src="https://mintcdn.com/criteo-e1682996/xLJjp01XGpYNB6pV/images/retail-media/v2025.10/docs/190da94-auth_methods.png?fit=max&auto=format&n=xLJjp01XGpYNB6pV&q=85&s=a6008cbabccdff8f9ea3daa45f17ab3b" alt="190da94 auth_methods" width="1876" height="787" data-path="images/retail-media/v2025.10/docs/190da94-auth_methods.png" />
</Frame>

***

### App activation

#### Service

Choose the Criteo service your API application will use: select C-Growth for Marketing Solutions or C-Max for Retail Media.

<Frame>
  <img src="https://mintcdn.com/criteo-e1682996/xLJjp01XGpYNB6pV/images/retail-media/v2025.10/docs/4a14336-services.png?fit=max&auto=format&n=xLJjp01XGpYNB6pV&q=85&s=ef632ec42cd23244658b164d5336f82a" alt="4a14336 services" width="1847" height="501" data-path="images/retail-media/v2025.10/docs/4a14336-services.png" />
</Frame>

***

### Authorizations

#### Domains

Choose the domains that define the permission access your application needs.

<Frame>
  <img src="https://mintcdn.com/criteo-e1682996/cmPz0RjwwK8-Y1zy/images/retail-media/v2025.10/docs/fb84380-portal-_step4final_1.gif?s=2a6f9ac0b31547c8d38554adea231361" alt="fb84380 portal _step4final_1" width="1896" height="750" data-path="images/retail-media/v2025.10/docs/fb84380-portal-_step4final_1.gif" />
</Frame>

After completing these steps, click `Activate app` to activate the application.

#### Redirect URI

* For applications using the authorization code workflow, you need to specify a **Redirect URI** as part of your app scope.

<Frame>
  <img src="https://mintcdn.com/criteo-e1682996/xLJjp01XGpYNB6pV/images/retail-media/v2025.10/docs/706af65-2023-06-30_14_57_56-My_First_App___Criteo_Developer_Portal.png?fit=max&auto=format&n=xLJjp01XGpYNB6pV&q=85&s=2233ca57beb7a9a6d9ed44af7a2fa3ef" width="1843" height="277" data-path="images/retail-media/v2025.10/docs/706af65-2023-06-30_14_57_56-My_First_App___Criteo_Developer_Portal.png" />
</Frame>

***

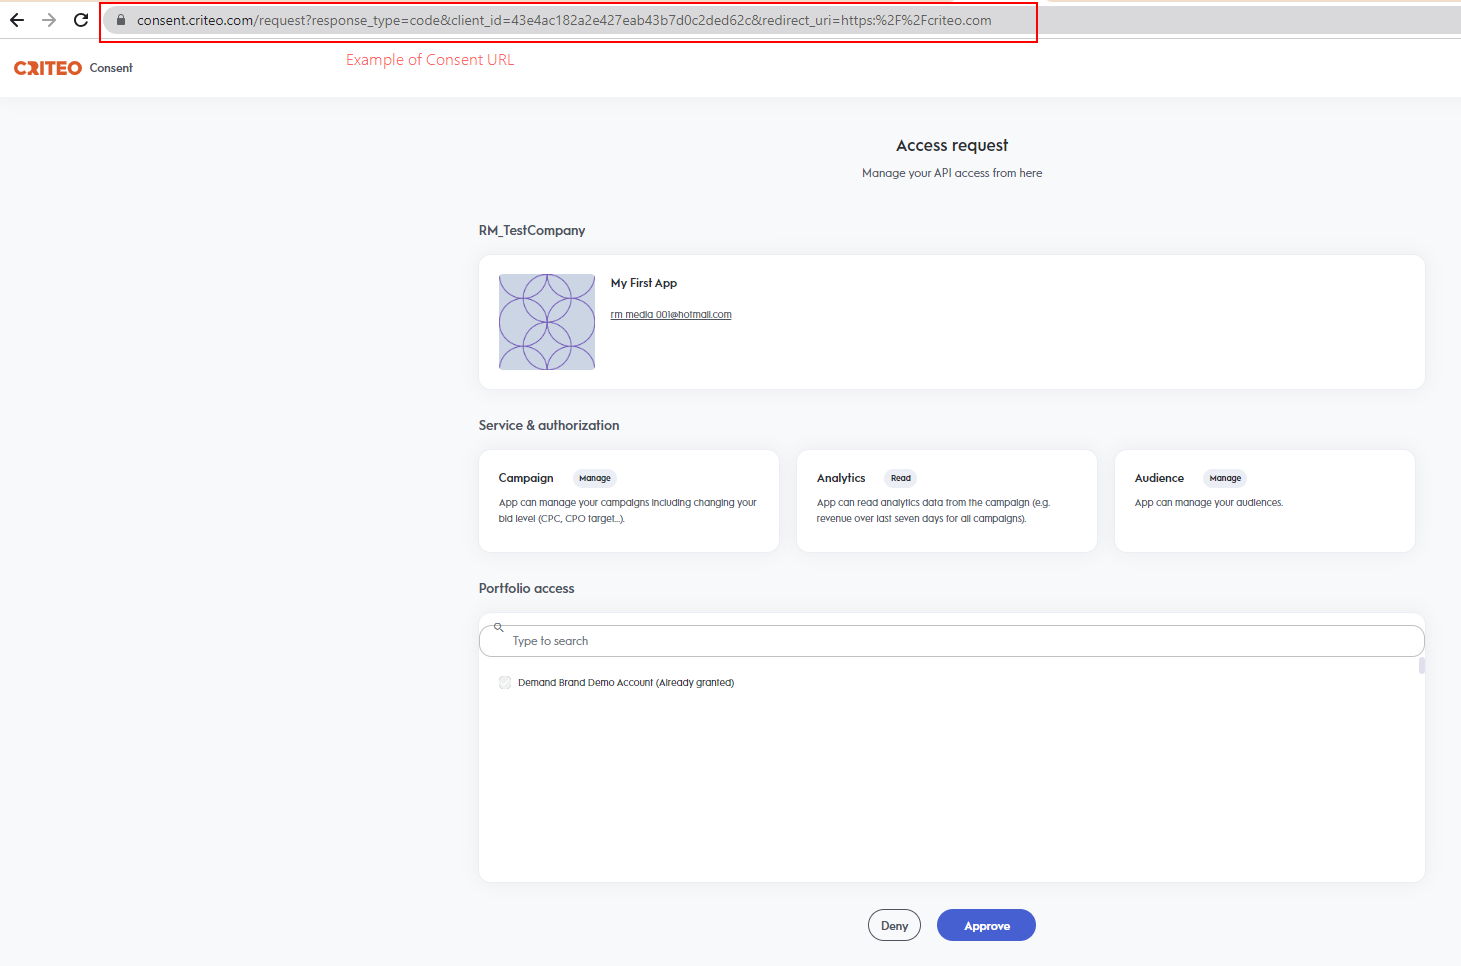
## Step 2. Set Up Your OAuth Parameters

After defining your application’s scope, set up the necessary parameters for the authorization code workflow.

<table>
  <thead>
    <tr>
      <th>
        <p>
          Parameters
        </p>
      </th>

      <th>
        <p>
          Description
        </p>
      </th>
    </tr>
  </thead>

  <tbody>
    <tr>
      <td>
        <p>
          <code>
            client\_id
          </code>
        </p>
      </td>

      <td>
        <p>
          Your public key, accessible in the app credentials section. You can manage up to 5 pairs of credentials, even after the app has been activated.
        </p>
      </td>
    </tr>

    <tr>
      <td>
        <p>
          <code>
            client\_secret
          </code>
        </p>
      </td>

      <td>
        <p>
          Your secret key, accessible only once when creating a pair of

          <code>
            client\_id
          </code>

          and

          <code>
            client\_secret
          </code>

          . You can manage up to 5 pairs of credentials after app activation.
        </p>
      </td>
    </tr>

    <tr>
      <td>
        <p>
          <code>
            redirect\_uri
          </code>
        </p>
      </td>

      <td>
        <p>
          The URL to redirect the user to after consent. Requires HTTPS. You can add up to 30 redirect URIs, manageable after app activation.
        </p>
      </td>
    </tr>
  </tbody>
</table>

You can now publish the app and initiate the authorization code workflow.

***

### Consent URL Creation

Once your app parameters are set, you can implement the authorization code flow.

#### Consent URL

1. To request access, create a Consent link that redirects the user, using the following structure:

<Info>
  **Authorization Code v. Client Credentials Consent URLs**

  If you're familiar with the Client Credentials workflow, you might notice that the `Generate Consent URL` button is not present in the partner portal for the authorization code workflow. This is because, with the authorization code method, you need to provide a redirect URI specific to your organization. Therefore, these URLs must be configured directly within your workflow.
</Info>

You will need to construct a consent URL similar to the example below while passing the required parameters for your application:

```http URL theme={null}
https://consent.criteo.com/request?response_type=code&client_id={client_id}&redirect_uri={redirect_uri}&state={state}
```

<table>
  <thead>
    <tr>
      <th>
        <p>
          Parameters
        </p>
      </th>

      <th>
        <p>
          Required
        </p>
      </th>

      <th>
        <p>
          Description
        </p>
      </th>
    </tr>
  </thead>

  <tbody>
    <tr>
      <td>
        <p>
          <code>
            response\_type=code
          </code>
        </p>
      </td>

      <td>
        <p>
          Yes
        </p>
      </td>

      <td>
        <p>
          Indicates that an authorization code is expected as outcome.
        </p>
      </td>
    </tr>

    <tr>
      <td>
        <p>
          <code>
            client\_id
          </code>
        </p>
      </td>

      <td>
        <p>
          Yes
        </p>
      </td>

      <td>
        <p>
          Your public key from the app credentials section.
        </p>
      </td>
    </tr>

    <tr>
      <td>
        <p>
          <code>
            redirect\_uri
          </code>
        </p>
      </td>

      <td>
        <p>
          Yes
        </p>
      </td>

      <td>
        <p>
          The URL to redirect the user after consent. Must match the configured URI.
        </p>
      </td>
    </tr>

    <tr>
      <td>
        <p>
          <code>
            state
          </code>
        </p>
      </td>

      <td>
        <p>
          No
        </p>
      </td>

      <td>
        <p>
          Optional string to prevent Cross-Site Request Forgery attacks.
        </p>
      </td>
    </tr>
  </tbody>
</table>

2. The consent link directs users to the `Criteo Consent page`, where they can select which advertisers to grant access to and approve the request.

<Frame caption="The Criteo Consent page allows selecting the advertisers to grand access to">
  <img src="https://mintcdn.com/criteo-e1682996/xLJjp01XGpYNB6pV/images/retail-media/v2025.10/docs/0151441-consentgeneration3.png?fit=max&auto=format&n=xLJjp01XGpYNB6pV&q=85&s=4145e1d088667be6df017c717eea62a9" alt="The Criteo Consent page allows selecting the advertisers to grand access to" width="1461" height="966" data-path="images/retail-media/v2025.10/docs/0151441-consentgeneration3.png" />
</Frame>

<br />

<Info>
  **Notes**

  A consent request will not be displayed if:

  * The `client_id` does not match a published API app.
  * The `redirect_uri` is unauthorized.
  * There is an unexpected backend error.

  In any of the cases above an error message will be displayed.
</Info>

***

### Redirection and Access Code

Upon completing the Consent Delegation, users are redirected to a URL similar to the example below:

```http URL theme={null}
https://www.yourdomain.com/?code=58f4cd15-8087-48af-bab7-bba06d2df1da&state=4lr4e
```

This URL is forged with the authorized `redirect_uri` and the following query parameters:

<table>
  <thead>
    <tr>
      <th>
        <p>
          Parameter
        </p>
      </th>

      <th>
        <p>
          Description
        </p>
      </th>
    </tr>
  </thead>

  <tbody>
    <tr>
      <td>
        <p>
          <code>
            code
          </code>
        </p>
      </td>

      <td>
        <p>
          A single-use authorization code valid for 60 seconds.
        </p>
      </td>
    </tr>

    <tr>
      <td>
        <p>
          <code>
            state
          </code>
        </p>
      </td>

      <td>
        <p>
          The originally provided state parameter, returned as-is.
        </p>
      </td>
    </tr>
  </tbody>
</table>

If consent is denied, the redirect will include an `error` query parameter instead of a `code`.

***

## Step 3. Exchanging Access Code For Access Token

With an authorization code, you can request an access token via a `POST` request:

```bash theme={null}
curl -L 'https://api.criteo.com/oauth2/token' \
-d 'client_id=<MY_CLIENT_ID>' \
-d 'client_secret=<MY_CLIENT_SECRET>' \
-d 'redirect_uri=<MY_URI>' \
-d 'code=<MY_CODE>' \
-d 'grant_type=authorization_code'
```

### Example

```bash theme={null}
curl -L 'https://api.criteo.com/oauth2/token?grant_type=authorization_code&client_id=<MY_CLIENT_ID>&client_secret=<MY_CLIENT_SECRET>&redirect_uri=<MY_URI>' \
-H 'Content-Type: application/x-www-form-urlencoded' \
-d 'client_id=<MY_CLIENT_ID>' \
-d 'client_secret=<MY_CLIENT_SECRET>' \
-d 'redirect_uri=<MY_URI>' \
-d 'code=<MY_CODE>' \
-d 'grant_type=authorization_code'
```

<table>
  <thead>
    <tr>
      <th>
        <p>
          Parameter
        </p>
      </th>

      <th>
        <p>
          Description
        </p>
      </th>
    </tr>
  </thead>

  <tbody>
    <tr>
      <td>
        <p>
          <code>
            grant\_type=authorization\_code
          </code>
        </p>
      </td>

      <td>
        <p>
          Indicates that you are providing an authorization code
        </p>
      </td>
    </tr>

    <tr>
      <td>
        <p>
          <code>
            code
          </code>
        </p>
      </td>

      <td>
        <p>
          Authorization code returned during redirection
        </p>
      </td>
    </tr>

    <tr>
      <td>
        <p>
          <code>
            redirect\_uri
          </code>
        </p>
      </td>

      <td>
        <p>
          Must match the

          <code>
            redirect\_uri
          </code>

          used for the authorization request
        </p>
      </td>
    </tr>

    <tr>
      <td>
        <p>
          <code>
            client\_id
          </code>
        </p>
      </td>

      <td>
        <p>
          Your public key from the app credentials
        </p>
      </td>
    </tr>

    <tr>
      <td>
        <p>
          <code>
            client\_secret
          </code>
        </p>
      </td>

      <td>
        <p>
          Your secret key, accessible when creating credentials
        </p>
      </td>
    </tr>
  </tbody>
</table>

The response from Criteo API will be the following:

```json theme={null}
{
    "access_token": "eyJhbGciOixxxxxxxxxxxxxxxxxxxxxxxxxxxxxxxxxxxxxxxxxxxxxxxxxxxx",
    "token_type": "Bearer",
    "refresh_token": "eyJhbGciOxxxxxxxxxxxxxxxxxxxxxxxxxxxxxxxxxxxxxxxxxxxxxxxxxxxx",
    "expires_in": 900
}
```

<table>
  <thead>
    <tr>
      <th>
        <p>
          Parameter
        </p>
      </th>

      <th>
        <p>
          Description
        </p>
      </th>
    </tr>
  </thead>

  <tbody>
    <tr>
      <td>
        <p>
          <code>
            access\_token
          </code>
        </p>
      </td>

      <td>
        <p>
          A short-lived (valid for 900 seconds) access token.
        </p>
      </td>
    </tr>

    <tr>
      <td>
        <p>
          <code>
            refresh\_token
          </code>
        </p>
      </td>

      <td>
        <p>
          A long-lived refresh token (that expires after 6 months) that can be used to renew the access token (see next section).
        </p>
      </td>
    </tr>

    <tr>
      <td>
        <p>
          <code>
            token\_type=Bearer
          </code>
        </p>
      </td>

      <td>
        <p>
          Type of token.
        </p>
      </td>
    </tr>

    <tr>
      <td>
        <p>
          <code>
            expires\_in
          </code>
        </p>
      </td>

      <td>
        <p>
          Lifetime of the token in seconds.
        </p>
      </td>
    </tr>
  </tbody>
</table>

<Warning>
  **Token Lifetime**

  The refresh token will be revoked if the user changes roles or leaves the organization. The account must be re-authorized through the consent flow by a new administrator.
</Warning>

***

### Using the refresh token

To renew an access token, use the following request:

```bash theme={null}
curl -X POST https://api.criteo.com/oauth2/token \
-H "Content-Type: application/x-www-form-urlencoded" \
-d "grant_type=refresh_token&code={code}&redirect_uri={redirect_uri}&client_id={client_id}&client_secret={client_secret}"

```

<table>
  <thead>
    <tr>
      <th>
        <p>
          Parameter
        </p>
      </th>

      <th>
        <p>
          Description
        </p>
      </th>
    </tr>
  </thead>

  <tbody>
    <tr>
      <td>
        <p>
          <code>
            grant\_type=refresh\_token
          </code>
        </p>
      </td>

      <td>
        <p>
          Indicates that you are providing a refresh token.
        </p>
      </td>
    </tr>

    <tr>
      <td>
        <p>
          <code>
            refresh\_token
          </code>
        </p>
      </td>

      <td>
        <p>
          Refresh token shared when requesting an access token.
        </p>
      </td>
    </tr>

    <tr>
      <td>
        <p>
          <code>
            client\_id
          </code>
        </p>
      </td>

      <td>
        <p>
          Your public key accessible in app credentials section.
        </p>
      </td>
    </tr>

    <tr>
      <td>
        <p>
          <code>
            client\_secret
          </code>
        </p>
      </td>

      <td>
        <p>
          Your secret key, accessible only once when creating a pair of

          <code>
            client\_id
          </code>

          and

          <code>
            client\_secret
          </code>

          in credentials section.
        </p>
      </td>
    </tr>
  </tbody>
</table>

The response will be the same as when issuing an access token

***

# Demo

Below is a demo application code (index.js) in **NodeJS** using the **Express JS** framework:

<CodeGroup>
  ```javascript JavaScript expandable theme={null}
  var express = require('express');
  var passport = require('passport');
  var OAuth2Strategy = require('passport-oauth2').Strategy;
  var app = express();
  var port = 3000;

  // Passport setup
  passport.use(new OAuth2Strategy({
      clientID: 'CLIENT_ID', // Enter your client_id here
      clientSecret: 'CLIENT_SECRET', // Enter your client_secret here
      authorizationURL: 'https://consent.criteo.com/request',
      callbackURL: `http://localhost:${port}/criteo-auth/callback`,
      tokenURL: 'https://api.criteo.com/oauth2/token',
      state: 'togorot'
    },
    function(accessToken, refreshToken, profile, cb) {
      cb(null, { accessToken, refreshToken });
    }
  ));
  app.use(passport.initialize());

  // Route declarations
  app.get('/', function(req, res) {
    res.send('<a href="/criteo-auth">Link my Criteo account!</a>');
  });

  app.get('/criteo-auth', passport.authenticate('oauth2'));

  app.get('/criteo-auth/callback',
    passport.authenticate('oauth2', { session: false }),
    function(req, res) {
      res.send(`<div>Authentication successful!</div><div>Access token:</div><textarea>${req.user.accessToken}</textarea><div>Refresh token:</div><textarea>${req.user.refreshToken}</textarea>`);
    }
  );

  console.log(`OAuth test app started on http://localhost:${port}`);
  app.listen(port);
  ```

  ```json JSON theme={null}
  {
      "name": "oauth-node",
      "version": "1.0.0",
      "description": "",
      "main": "index.js",
      "scripts": {
          "start": "node index.js"
      },
      "author": "",
      "license": "ISC",
      "dependencies": {
          "ejs": "^3.1.6",
          "express": "^4.17.1",
          "passport": "^0.4.1",
          "passport-oauth2": "^1.6.0"
      }
  }
  ```
</CodeGroup>

***

## Run the demo

1. Run `npm install`,
2. Connect to the developer portal and create an app.
3. Create an "Authorization code" app.
4. Generate app credentials and enter the `client_id `and `client_secret` in `index.js`.
5. Register "[http://localhost:3000/criteo-auth/callback](http://localhost:3000/criteo-auth/callback)" as the redirect URI.
6. Run `npm run start`,
7. Open [http://localhost:3000](http://localhost:3000).

***

<Warning>
  **What if my `client_id` and `client_secret` are compromised?**

  Delete the credentials in the App page and create new ones. Users will need to re-authorize access.
</Warning>

## What's next

* [Developer Accounts](/retail-media/v2025.10/docs/developer-accounts-organizations-apps)
