

Overview
Criteo serves personalized ads to mobile app users that have a high probability of clicking through and either installing your app or making an in-app purchase. Criteo technology is based on real-time product recommendation optimization and prediction engines. In order to enable its technology, Criteo needs:- App Events — App events and relevant data correctly captured on your mobile app
- Catalog Feed — A CSV or XML file (called a Catalog Feed) containing product information of a large portion of your mobile app’s offers
- (For Retargeting) Deeplink and Universal Link capability — Product level deep link capabilities in app to take users to the products they clicked on
- App events and parameters
- Kochava dashboard configuration, including postbacks
- Generation of tracking links
- Catalog feed integration (for product-level ads)
- Deeplinking & Universal Linking (for Retargeting)
- Testing process
Integration Steps
App Events & Data
If you already have Kochava events configured, please skip this section. To integrate the Kochava SDK and events from scratch, or add additional ones, please expand this section.Expand
Expand
SDK Initialization
Use the following code snippet at the app launch:Events Implementation in the App
Below are examples of the different event types Criteo recommends that you integrate using the Kochava SDK:SessionBegin
ThesessionBegin event should be sent to Kochava with each new session, after Kochava SDK initialization. SessionBegin is a standard event supported by the Kochava SDK.View Listing
TheviewListing event should be triggered on pages displaying product lists like a category page or a search results page. You should include in the array the IDs of the top 3 products (it’s fine to include more). These IDs must match those passed in the catalog feed. Note that viewListing is not supported out of the box using Kochava’s SDK and must be implemented as a custom event.View Product
TheView event should be triggered on all product details pages. You should include the ID of the product detailed on the page by the Event Item name, and send the Event Item with the event. It must be the same ID as used in the catalog feed, and must be unique. View is a standard event supported by the Kochava SDK.View Basket
TheviewBasket event should be triggered on the basket-details pages. You must include the IDs, prices, and quantities of the basket’s products by the Event Items array. Note that viewBasket is not supported out of the box using Kochava’s SDK and must be implemented as a custom event.din/dout parameters are only required for Travel apps (Flights/Hotels/Car Booking) clients.
Purchase
ThePurchase event should be triggered on order confirmation pages. You should include a unique transaction ID and place the IDs, prices, and quantities of the products bought in the transaction into the Event Items array. Purchase is a standard event supported by the Kochava SDK.Level Achieved
TheuserLevel event allows Kochava to identify the highest level achieved by a user. This event is specific to the Gaming vertical. It should be triggered every time the user levels up. userLevel is a standard event supported by the Kochava SDK.Status
TheuserStatus event allows Kochava to identify a user’s subscription status (i.e. free, subscriber, premium). This event should be triggered to initialize the user’s status and every time when their status changes. Note that userStatus is not supported out of the box using Kochava’s SDK and must be implemented as a custom event.Achievement Unlocked
TheachievementUnlocked event allows Kochava to identify whether a user has reached a specific milestone within the game. achievementUnlocked is a standard event supported by the Kochava SDK.Hashed Email for Cross-Device Targeting (Recommended)
Clients have the option of sending Criteo the email address of app users when available. This will enable the cross-device Criteo targeting feature.Expand
Expand
To generate a SHA256 hash of an email address:Kochava’s SDK also allows client apps an option to send email in clear text. Kochava servers will hash this email address before forwarding it to Criteo.Use the following code snippet as an example of how to send raw email addresses:
- Convert all characters to lower case
- Remove any blank spaces
- Convert to UTF-8
- Hash using SHA256 algorithm
Kochava Dashboard Configuration
Adding the ‘Criteo New’ Network
To add ‘Criteo New’ as a partner on Kochava’s dashboard:- Login to Kochava Dashboard
- Select your App
- Under App Configurations, go to the Partner Configurations tab
- Click Add Configuration button
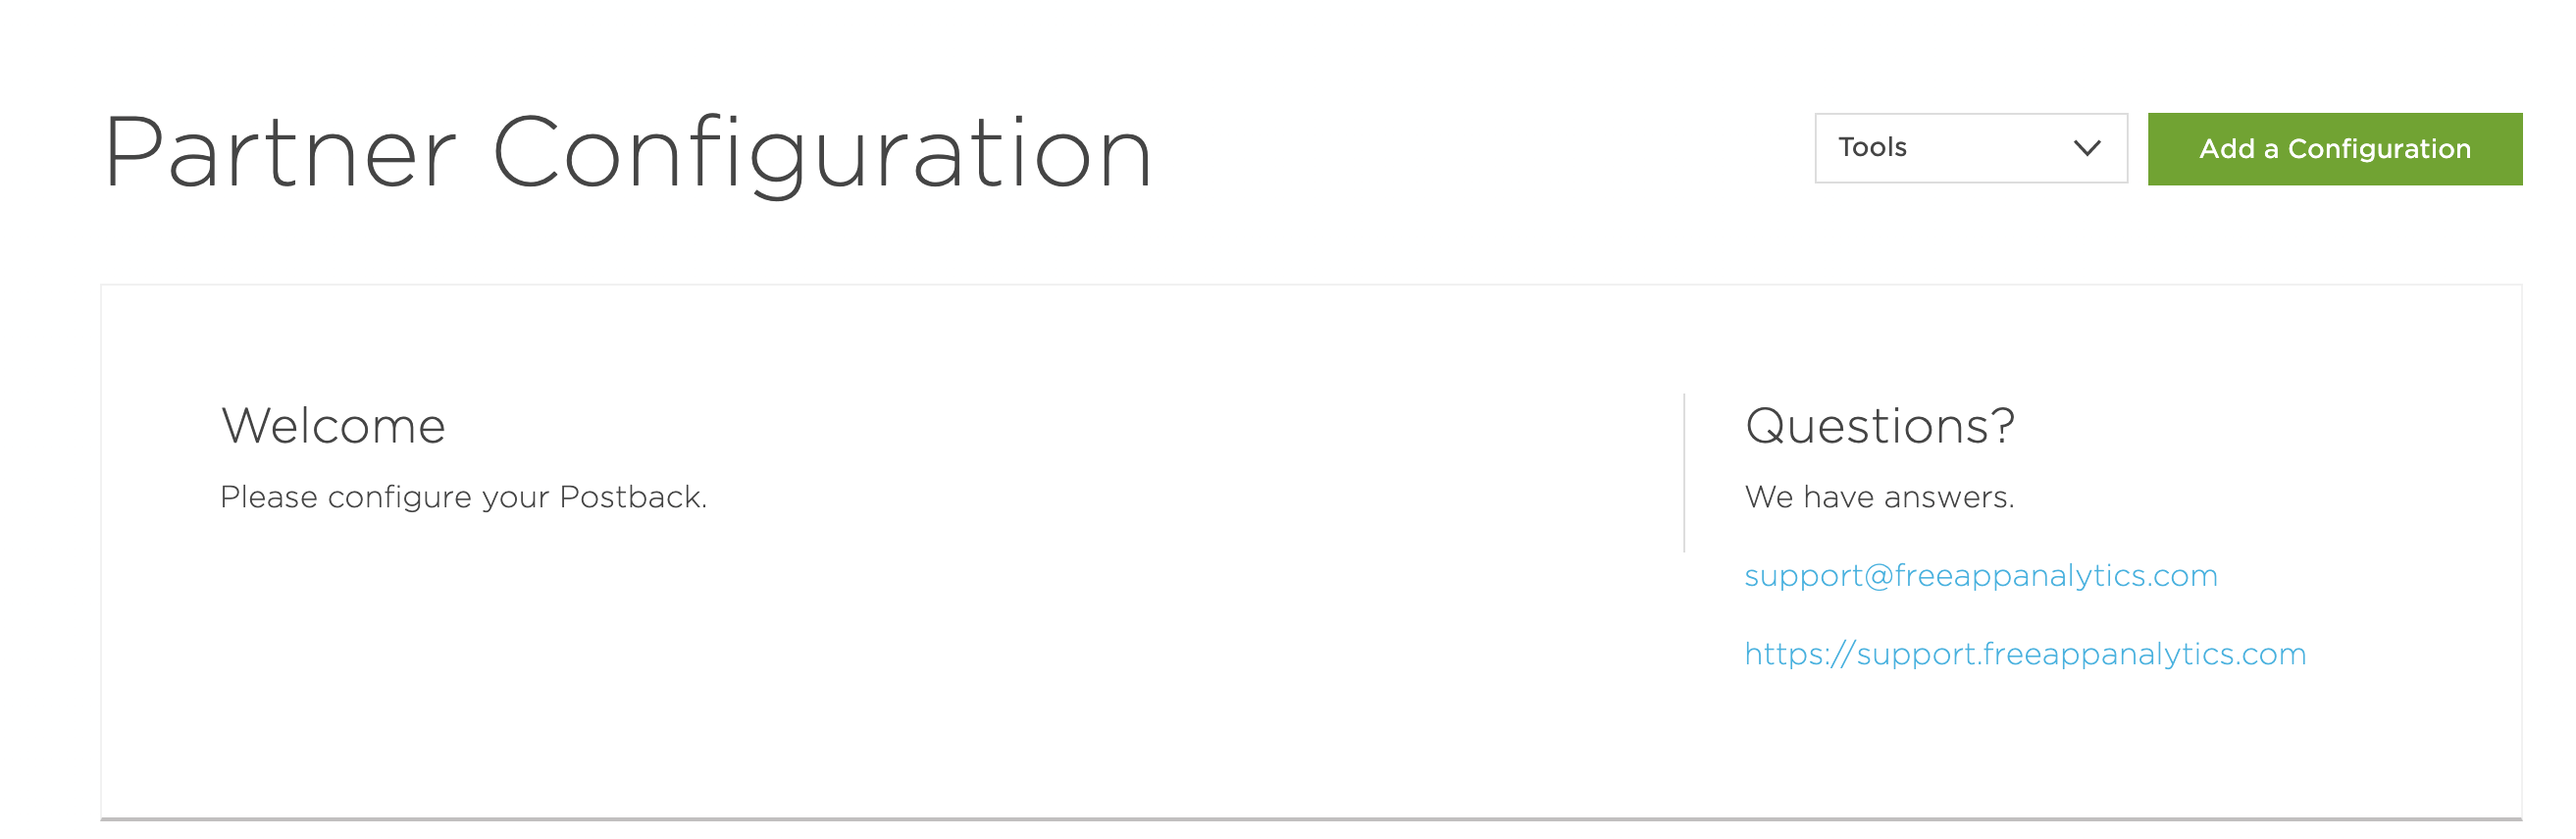
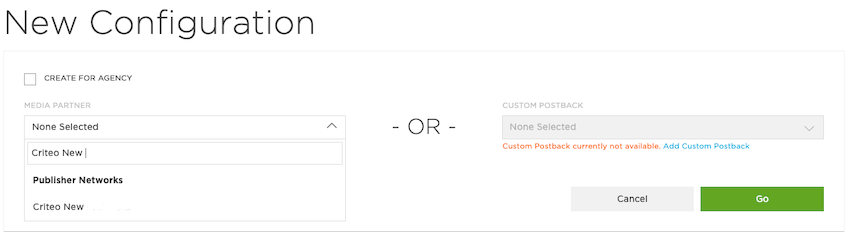
Configuring Criteo Postbacks
Once the partner is configured, postbacks can be set up for each event type.- Expand the ‘Criteo New’ module and go to the Postbacks tab.
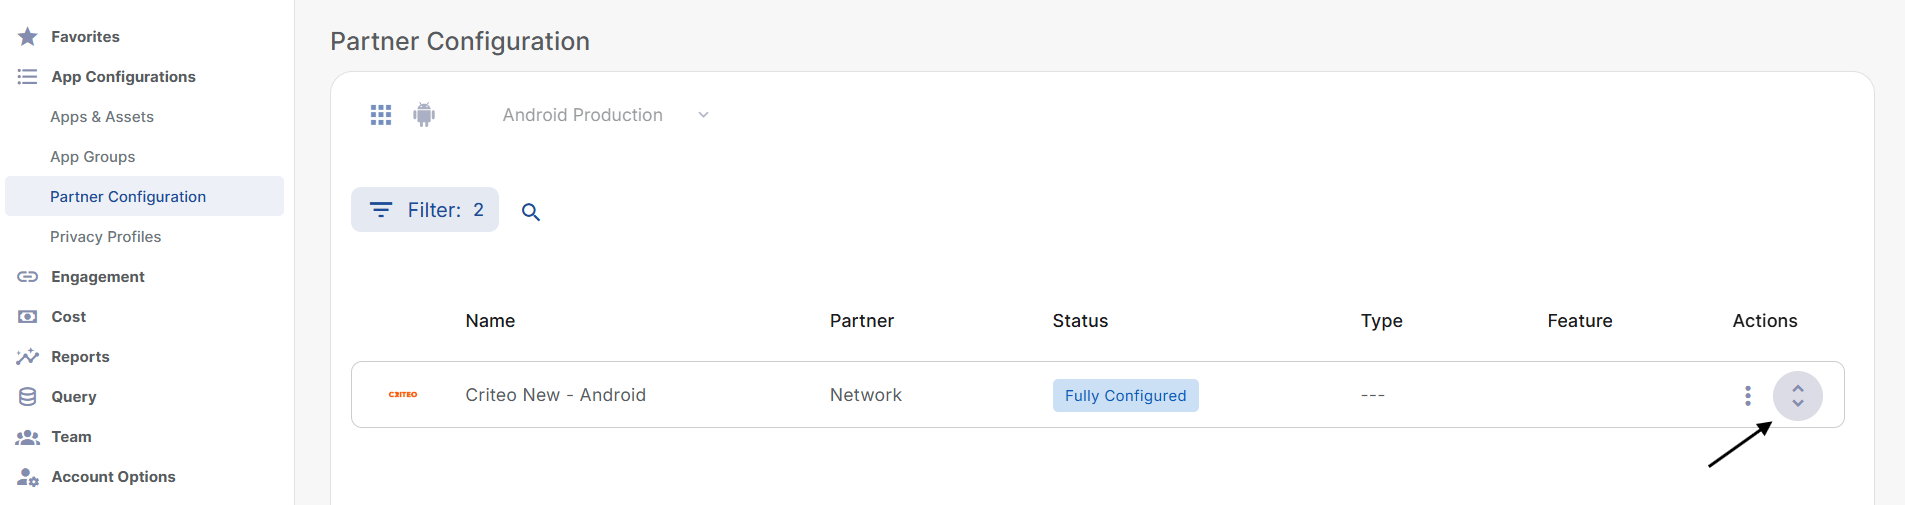
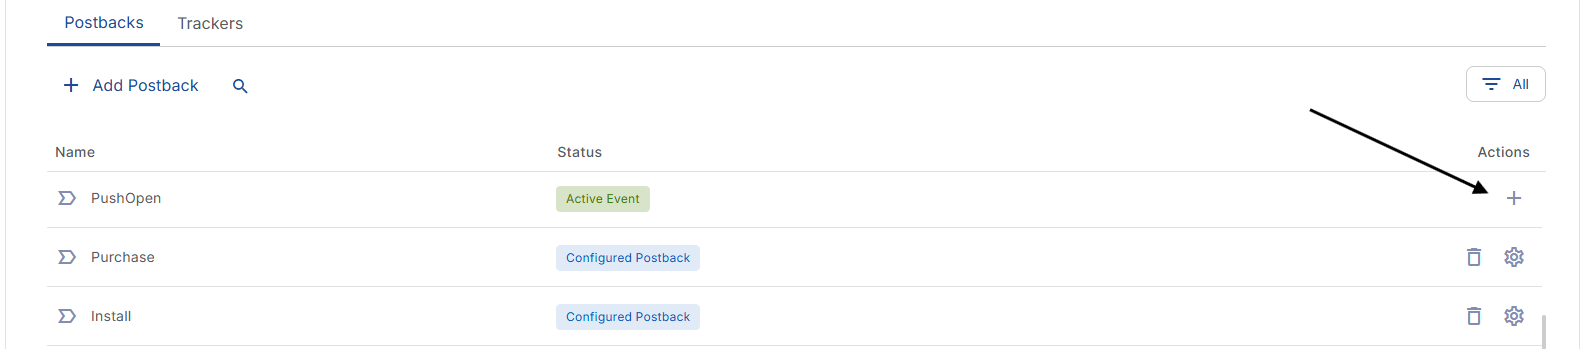
- Install is automatically listed and its status is Configured Postback, however, it still needs additional setup (please see step 4 below for details). SessionBegin and the other post-install events will be listed once received by Kochava. All the events (except Install) are initially in status Active Event, meaning the postback is available but is not sending to Criteo yet. Once a postback is configured, its status becomes Configured Postback.
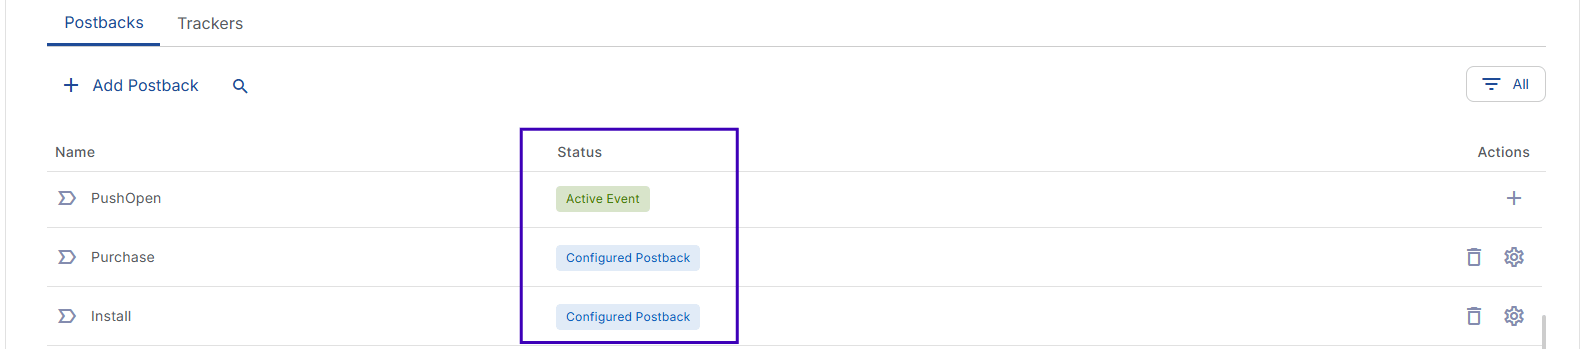
- Click the + icon next to an event to create a postback for it.
- The postbacks need to be configured for: Install, SessionBegin, and all other relevant events for the campaign, such as post-install KPI events.
- For Retargeting, it’s highly recommended to also postback the key stages of the purchase funnel (for a retail app this would be events similar to SessionBegin, Search/Category Results, Item Details, Add to Cart, Basket View, Purchase Confirmation).
- All the following settings are required for postbacks to function well:
- CRITEO BUNDLE ID: Unique bundle ID of the app (this uniquely identifies the app to Criteo)
- SEND ALL EVENT DATA: Switch the toggle ON to send all data to Criteo. Essential for harnessing Criteo’s machine learning at its full potential (predictive bidding and product recommendations), and useful for other use cases such as audience segmentation and custom reporting.
- DELIVERY DELAY: Select Realtime Delivery
- DELIVERY METHOD: Select All to send attributed, unattributed and organic events to Criteo. Essential for the same machine learning purposes mentioned above, and also to better suppress installed users from your App Install campaigns.
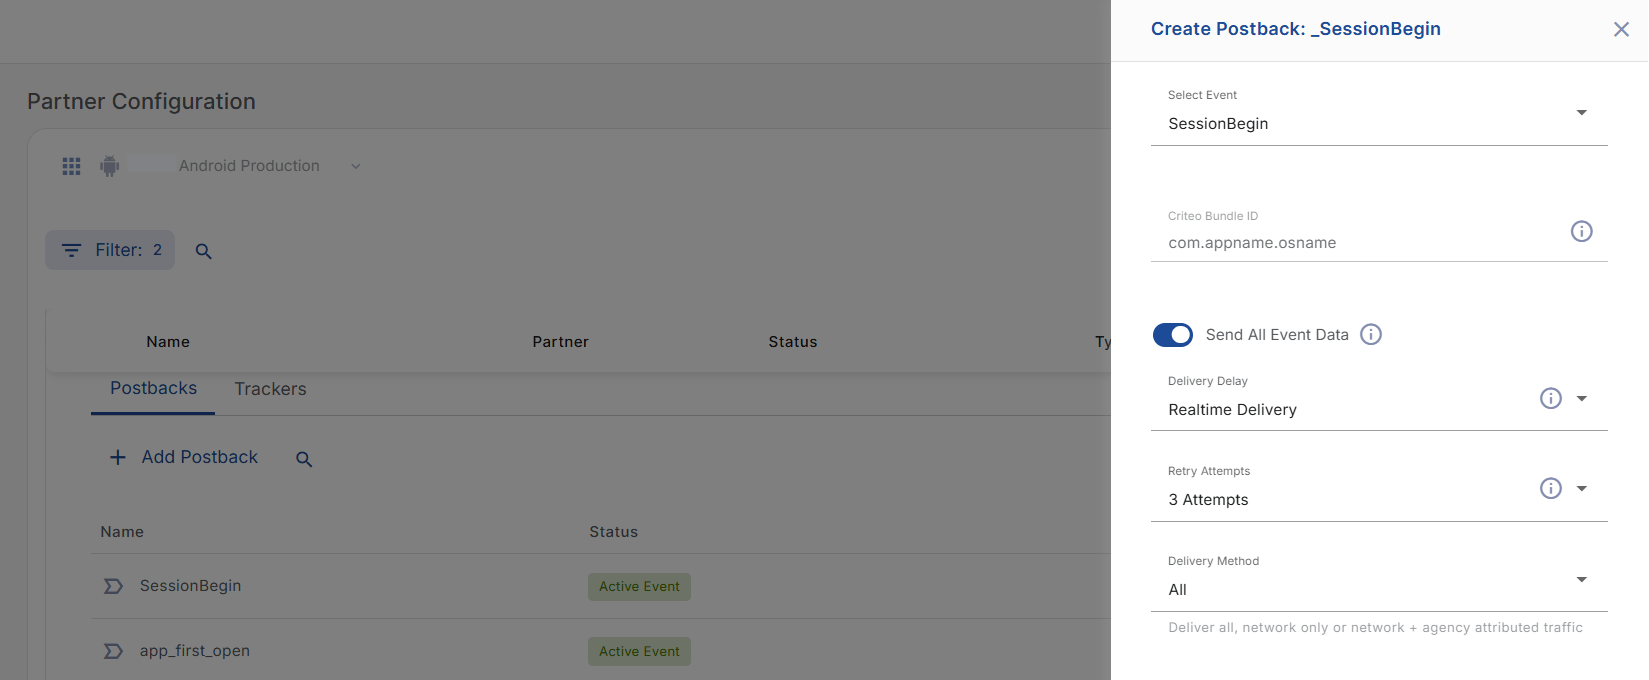
For Install, there is no Send All Event Data option to toggle.
Attribution Settings — Partner Level
Keep in mind that the following settings are Criteo’s recommendations but the ultimate goal is to match the options you want to take into account for your setup!
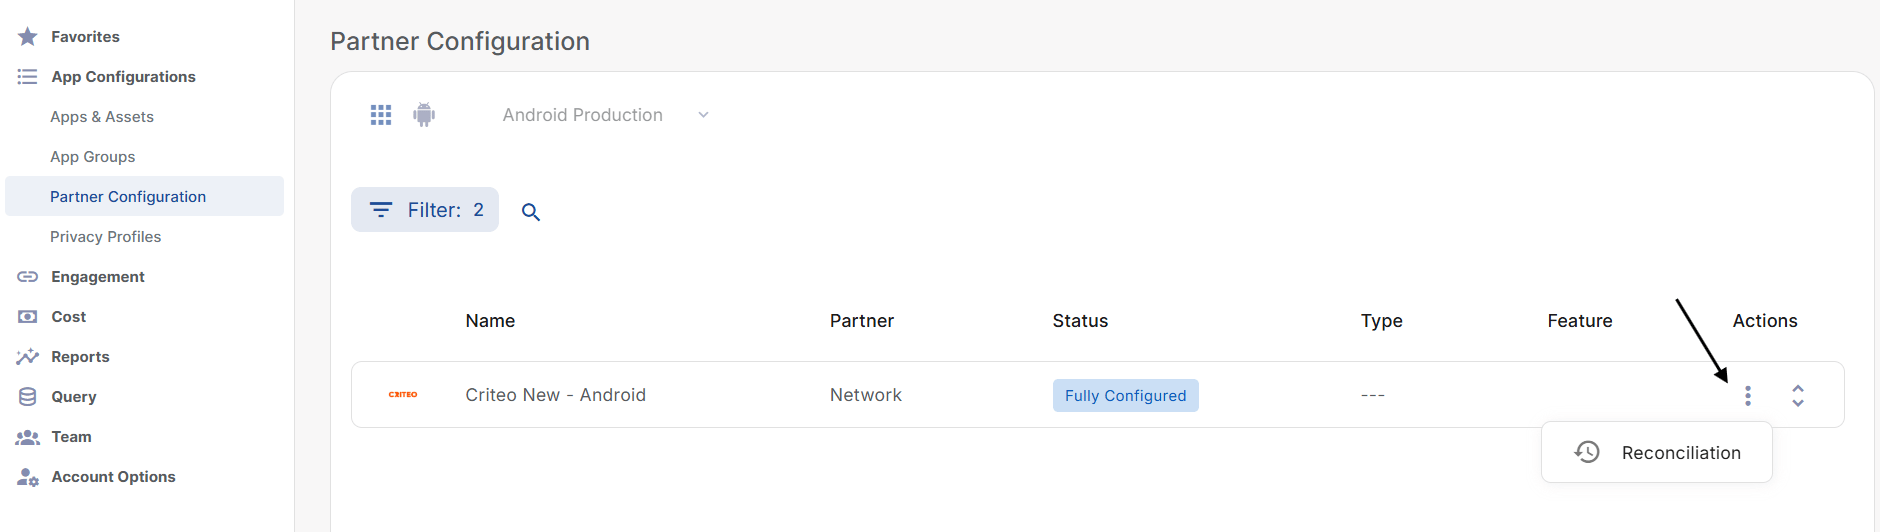
- Under App Configurations, go to Partner Configurations
- To the right side of the ‘Criteo New’ module, select the three-dots menu
- Click Reconciliation
- Configure the windows below according to your attribution model, or these suggested defaults:
- Device Lookback — Uses a device identifier to match an ad impression to an install/conversion. If set to
24hours: if the install/conversion happens within 24 hours after the impression, attribution is allowed. - Modeled Lookback — The maximum time before an install during which Kochava considers an impression for attribution when a modeled/probabilistic match is used. Modeled attribution is used when no usable device identifier is available and relies on probabilistic device information—primarily IP address and User Agent. If set to
24hours: Attribution is allowed if the install/conversion occurs within 24 hours of the impression. - IP Lookback — The maximum time prior to an install during which Kochava considers impressions for attribution using a modeled IP-based match, where the impression and install are matched using the full IP address, without requiring the User Agent to match. If set to
24hours: Attribution is allowed if the install/conversion occurs within 24 hours of the impression, when device/modeled matching aren’t available. - Partial IP Lookback — Uses a less precise version of the IP address. If set to
24hours: expands probabilistic matching coverage for impression attribution. - Device Attribution Behavior — Determines whether Kochava will attempt fingerprint matching when a Device ID is present on the engagement. The default is Standard, which means it will not attempt fingerprinting if the device ID is present.
- Device Lookback — Uses device IDs to match clicks to installs/conversions. If set to
30days: if the install/conversion happens within 30 days after clicking the ad, attribution is allowed. - Modeled Lookback — Modeled Lookback determines how far back, from the time of install, to consider engagements for attribution on a Modeled based match. If set to
7days: Attribution is allowed if the install/conversion occurs within 7 days after the click. - IP and Partial IP Lookback — If set to
24hours: Allows Kochava to use IP-only and partial-IP matching for click attribution when device/fingerprint matching aren’t available. - Device Attribution Behavior — Determines whether Kochava will attempt fingerprint matching when a Device ID is present on the engagement. The default is Standard, which means it will not attempt fingerprinting if the device ID is present.
- Modeled Attribution Tier — Modeled Attribution Tier determines the Modeled validation configuration. The Standard setting validates based on a combination of IP Address and User Agent. The Full IP Address setting validates based on IP Address regardless of User Agent. The Partial IP Address setting validates based on the first three stanzas of the IP Address. By default, Modeled Attribution is set to Standard.
Tracking Links
Install Tracking
Click to Expand
Click to Expand
- Add Tracking to the Campaign
- Log in to Kochava
- Select the desired App
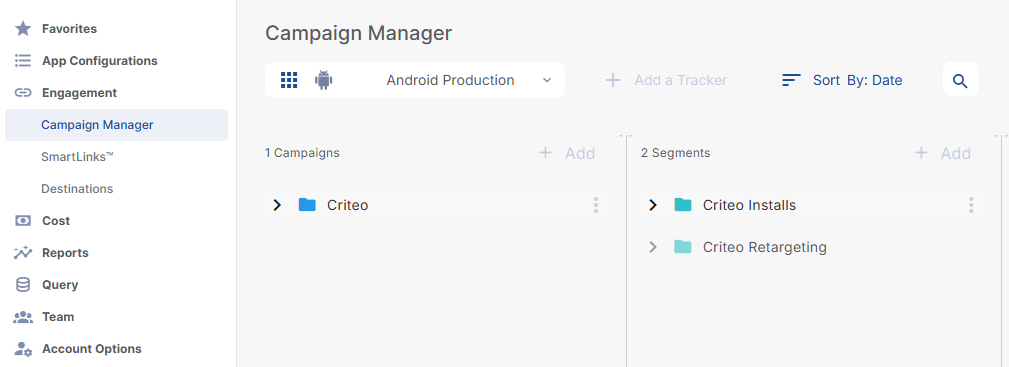
- Go to Engagement > Campaign Manager
- Click ‘Add a Tracker’ or Select Segment > ‘Add a Tracker’
- Set the Tracking
- Required:
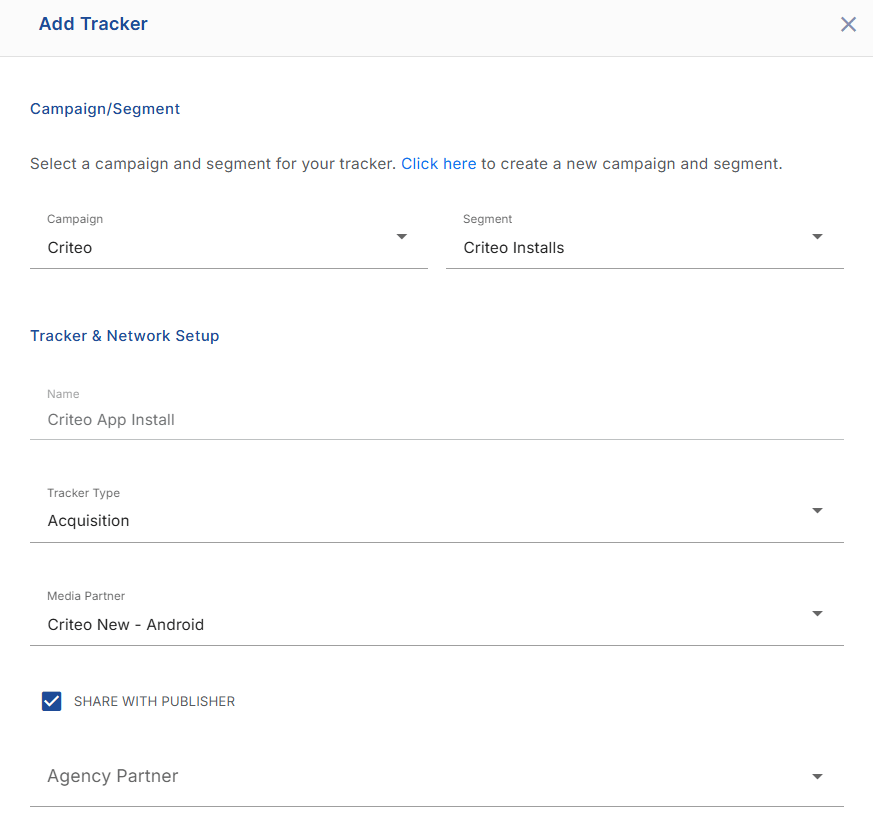
- Select Campaign
- Select Segment
- Set Tracker Name
- Select Tracker Type: Acquisition
- Select Media Partner: Criteo New - Android
- Check the box for Share with Publisher
- Set Destination URL: Custom / Landing page / Google Referrer
- Optional:
- Agency Partner
- UTM Parameters
- Custom Parameters
- Pricing
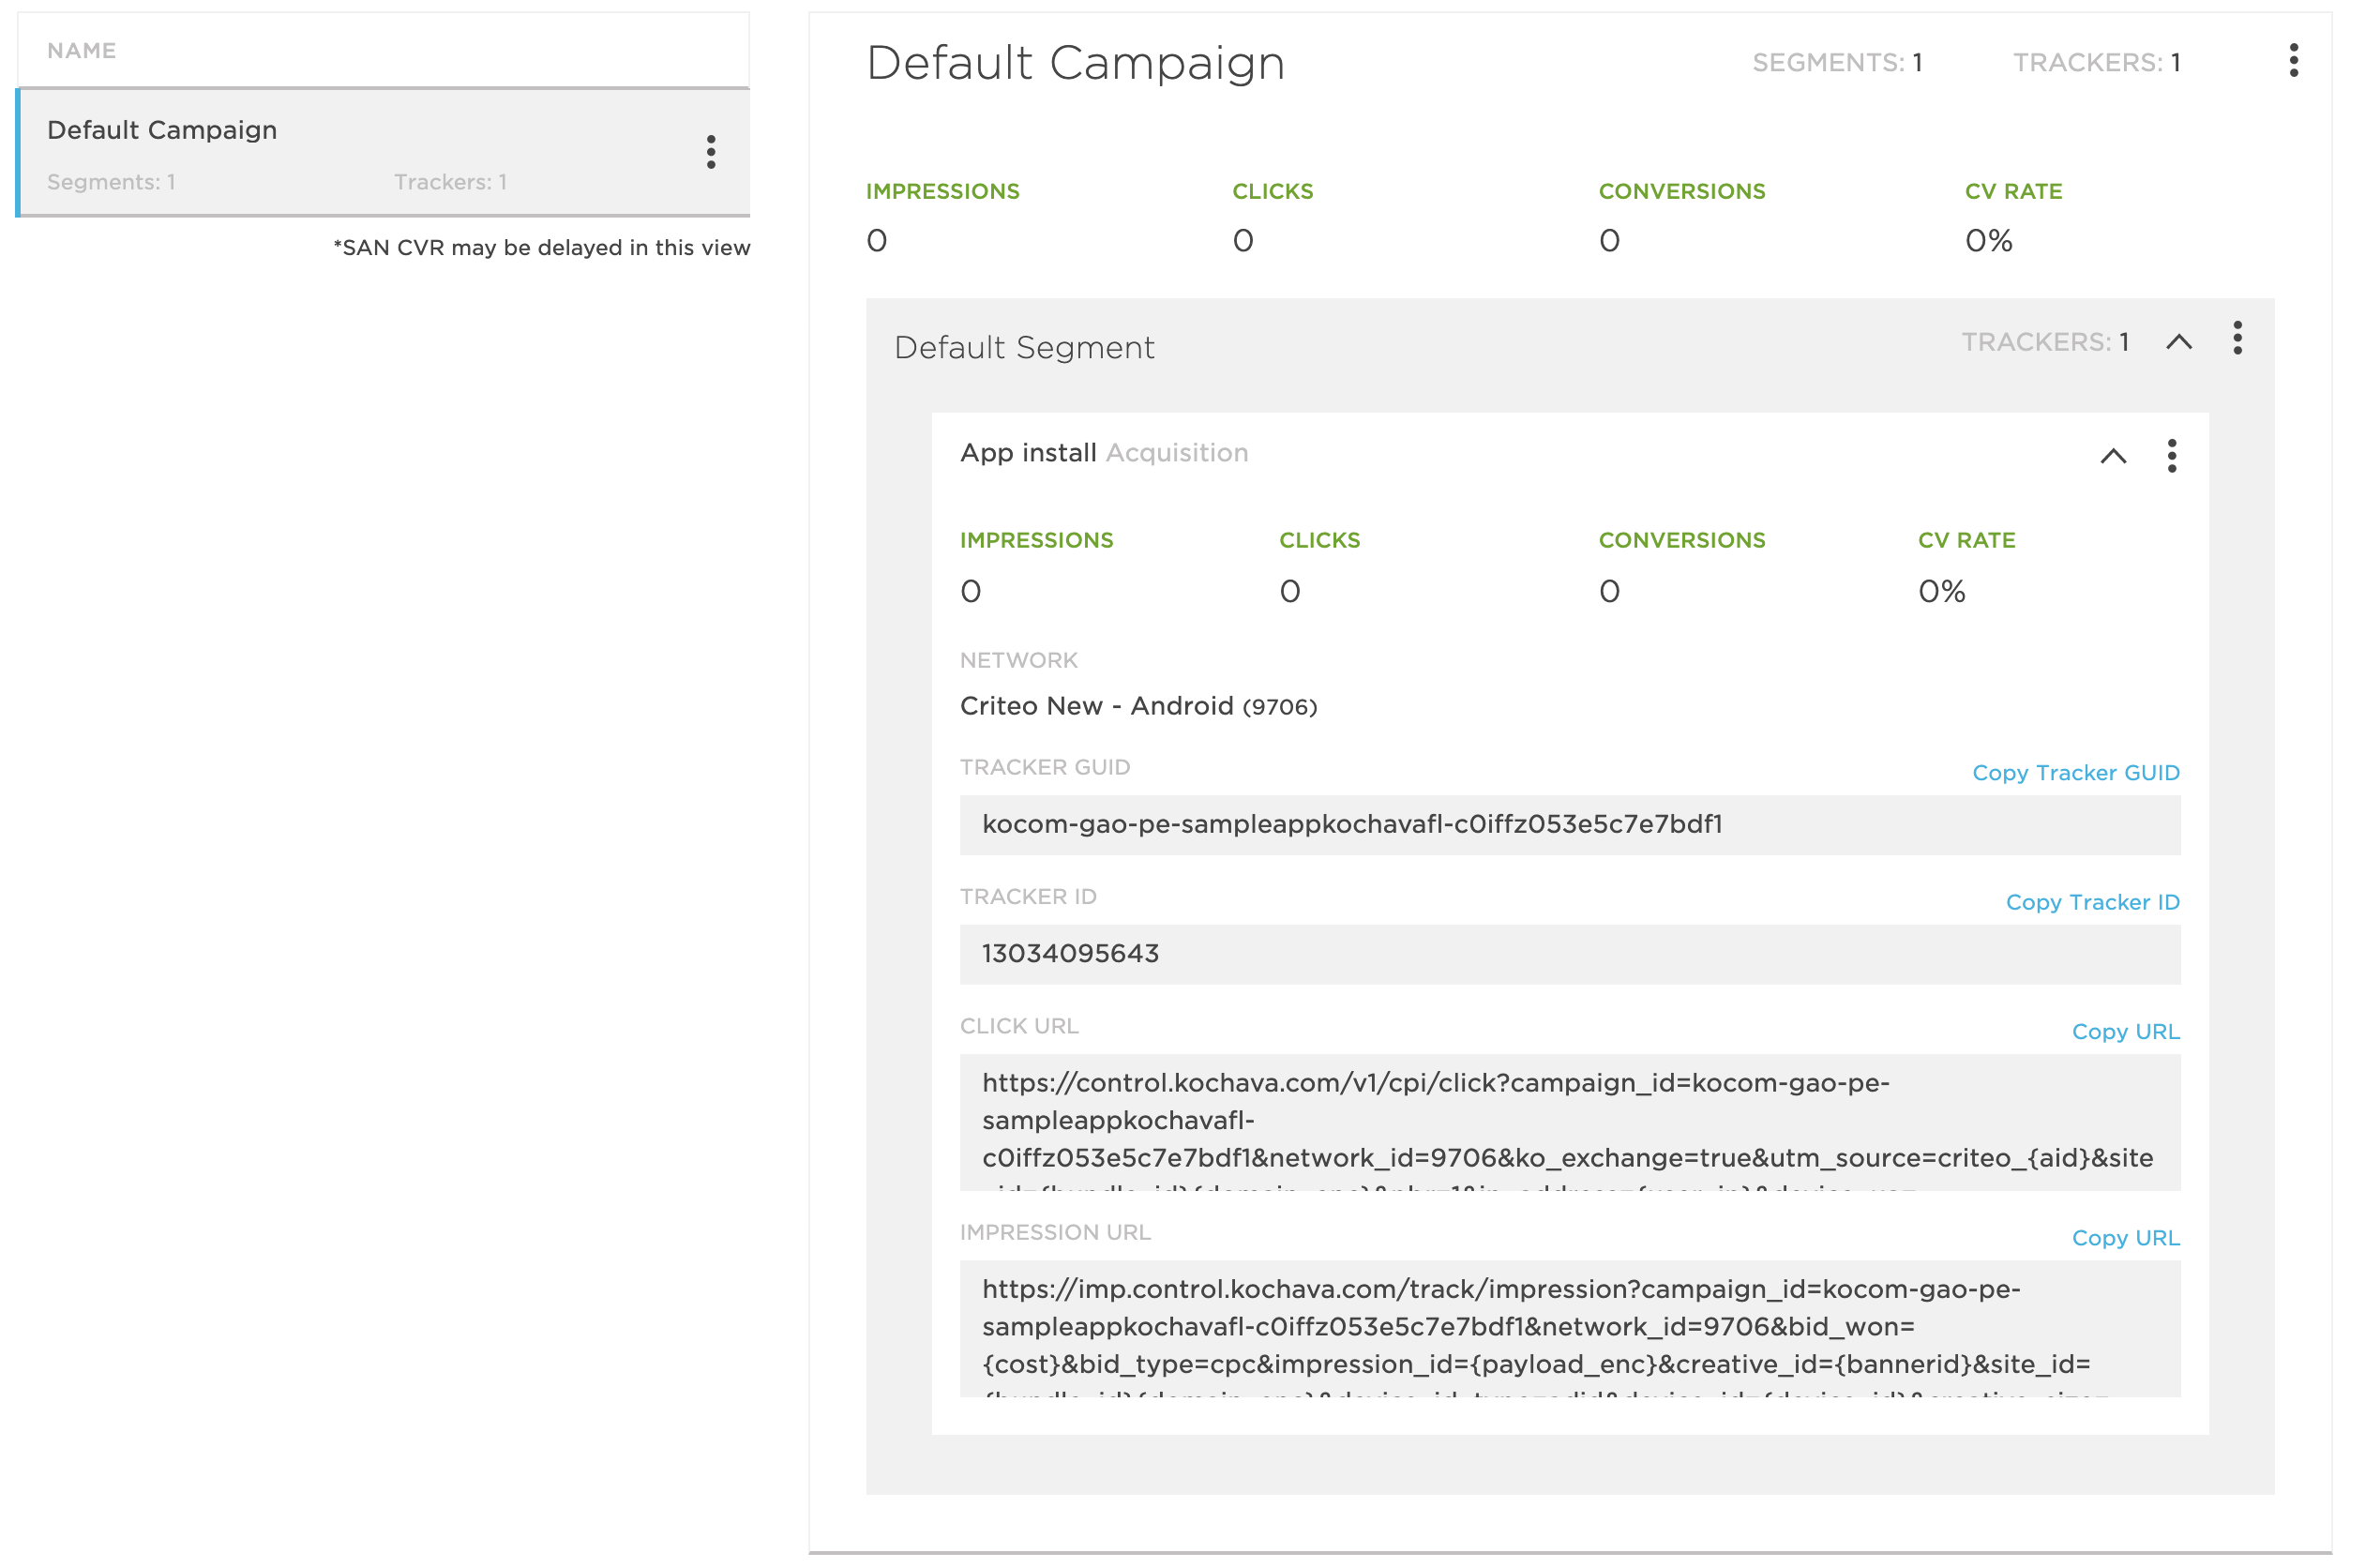
- Copy Click URL and Impression URL
Retargeting Tracking
Click to Expand
Click to Expand
- Add Tracking to the Campaign
- Log in to Kochava
- Select the desired App
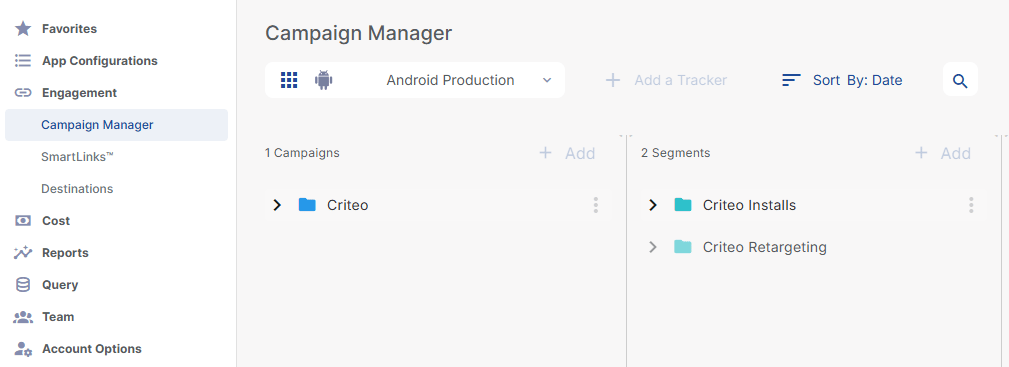
- Go to Engagement > Campaign Manager
- Click ‘Add a Tracker’ or Select Segment > ‘Add a Tracker’
- Set the Tracking
- Required:
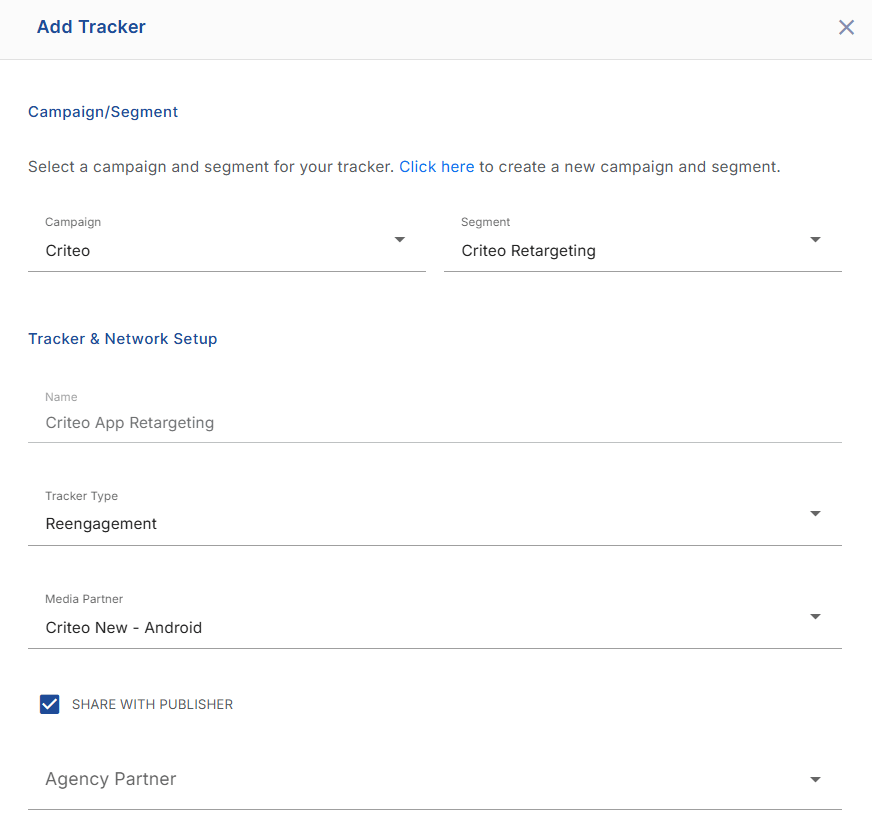
- Select Campaign
- Select Segment
- Set Tracker name
- Select Tracker Type: Reengagement
- Select Media Partner: Criteo New - Android
- Check the box for Share with Publisher
- Set Destination URL: Custom / Landing page / Google Referrer
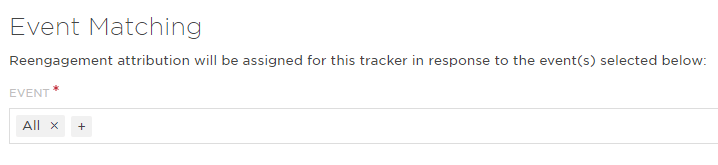
- Select Event(s) for Reengagement: ‘All’ (if All is not selected and an event is not in the list, Criteo will not be able to effectively optimize toward the KPI events).
- Optional:
- Agency Partner
- UTM Parameters
- Custom Parameters
- Pricing
- Set a custom lookback window
- Tracker-level lookback windows can be set within Power Editor → Tracker Overrides, however this is a paid feature of Kochava.
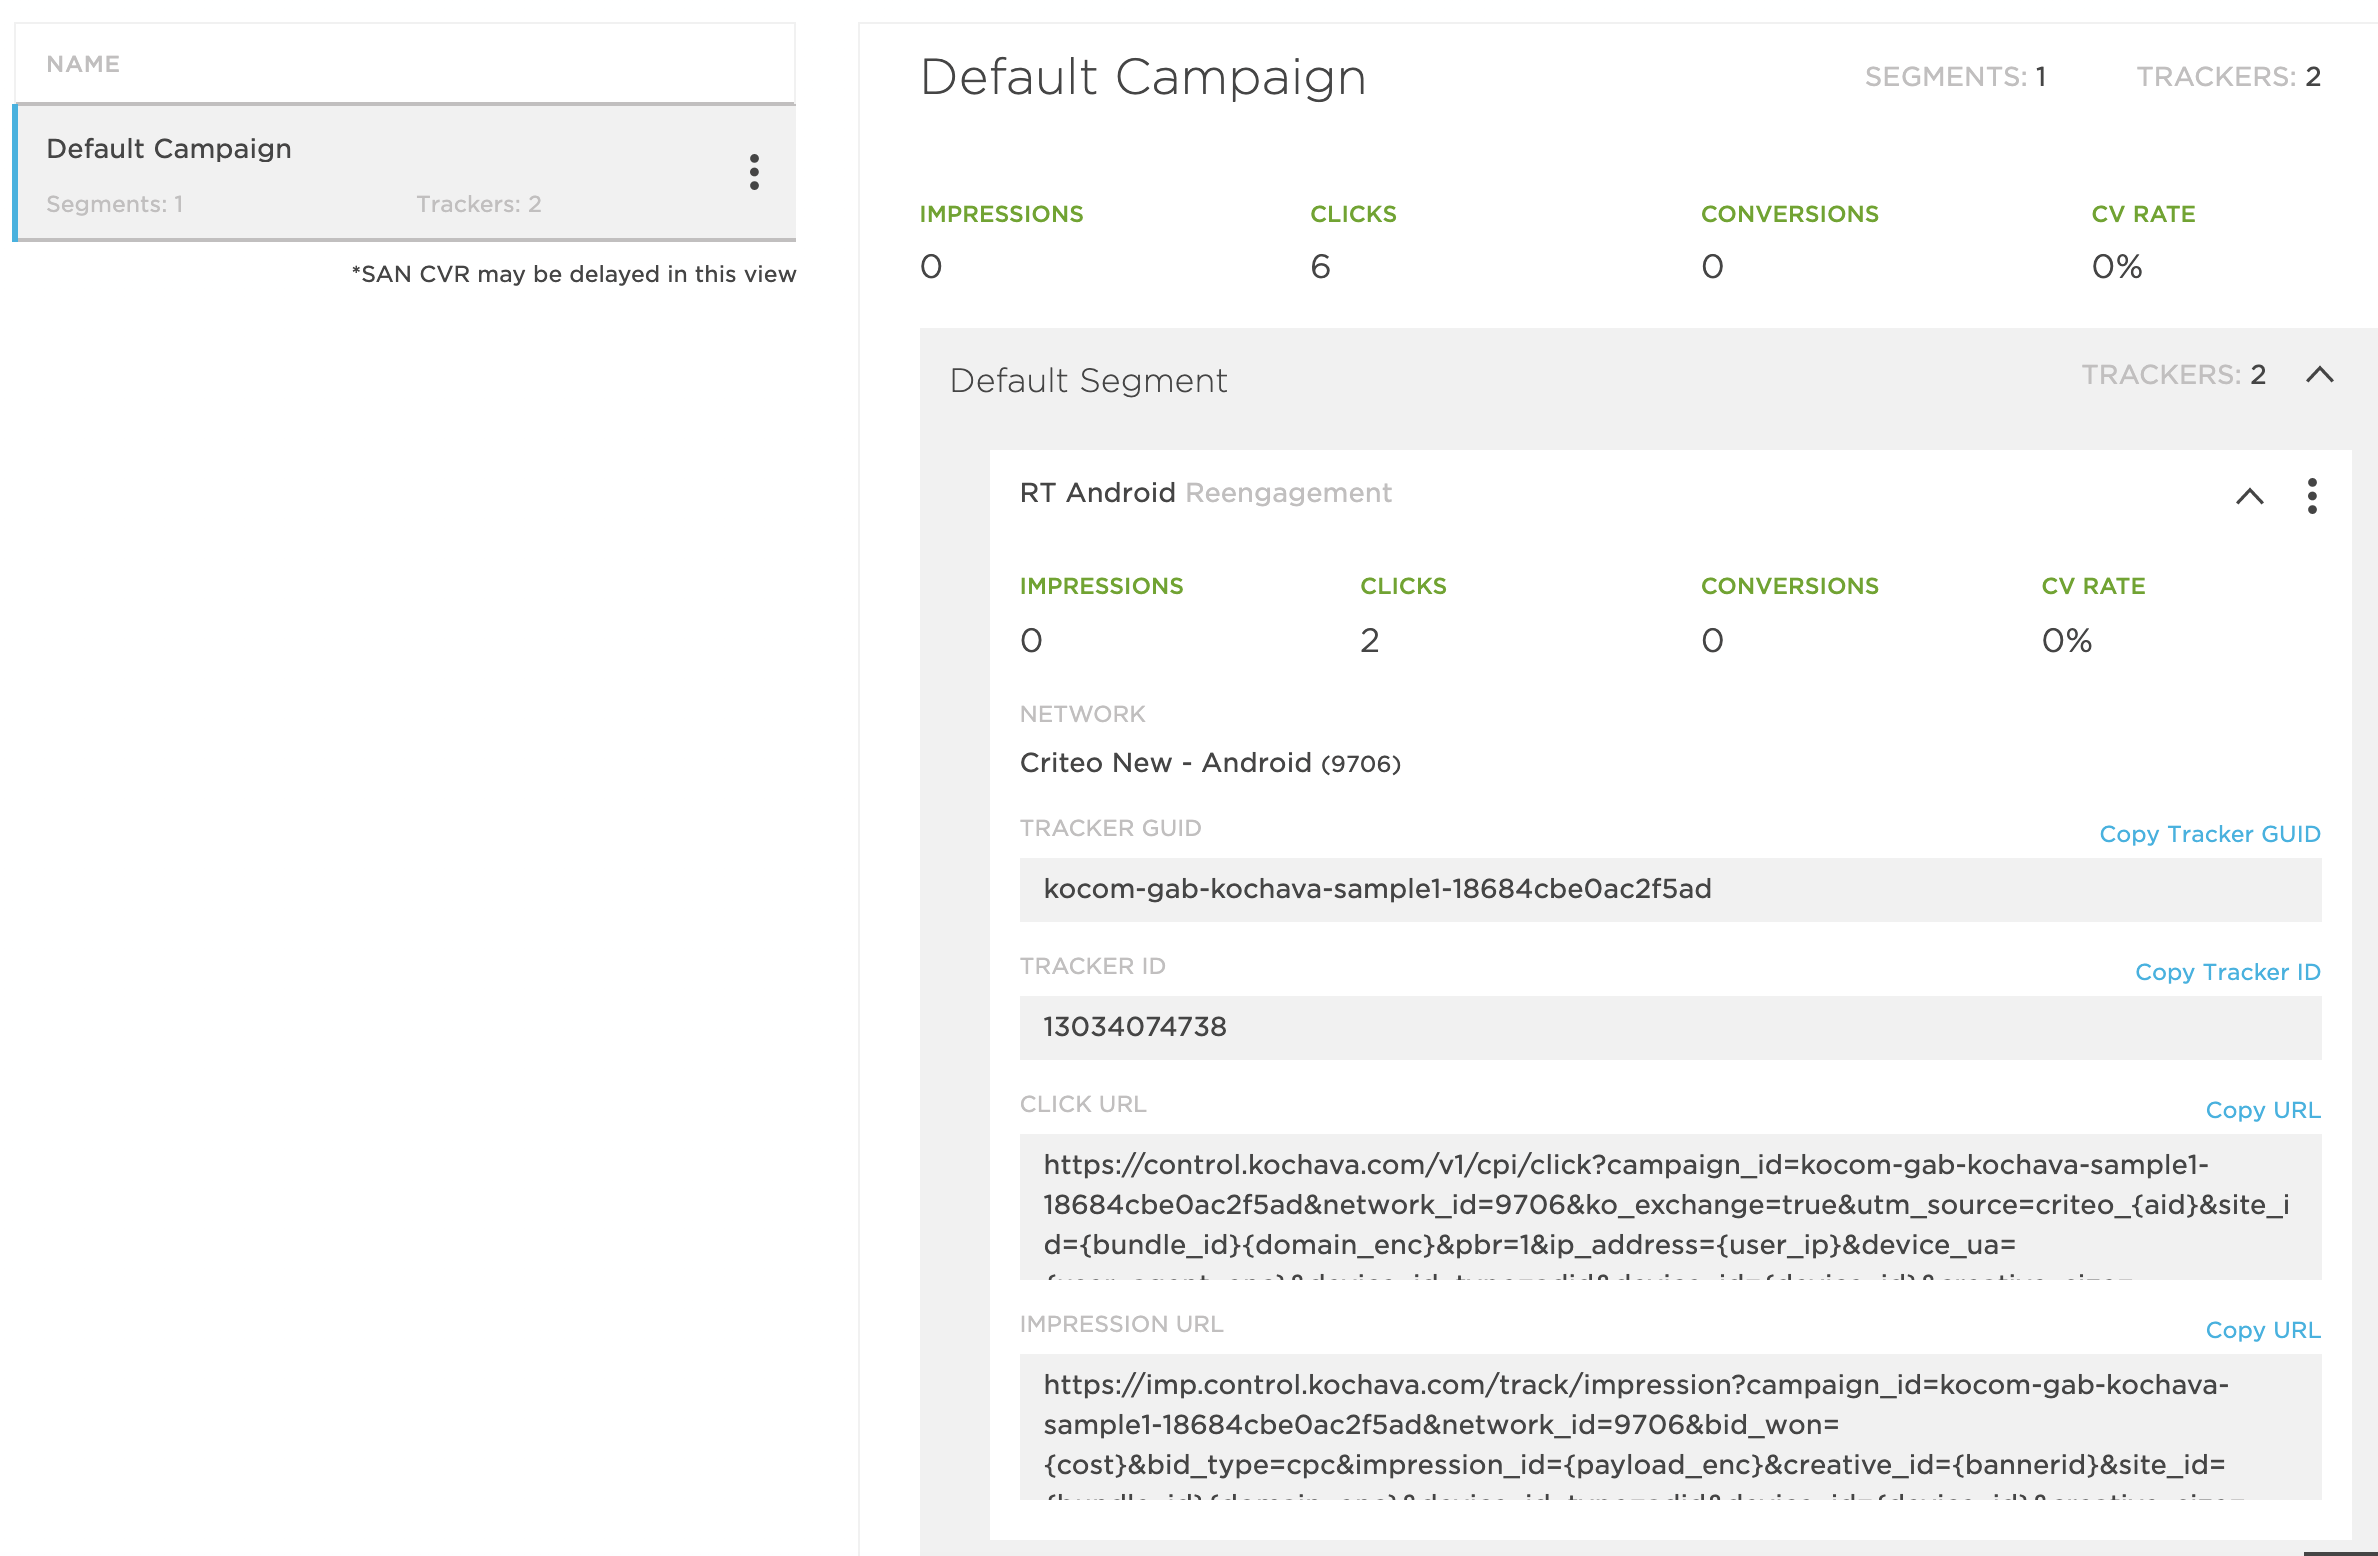
- Copy Click URL and Impression URL and send to your Criteo contact
Catalog Feed
A catalog feed is an XML or a CSV file containing product information (name, price, deep link, image link…) that allows Criteo to dynamically generate product-level banners tailored to each user. Therefore, it is important to keep this file up to date in order for Criteo to show the right data in your banners. The following points need to be kept in mind:- Each product must have a unique ID that must be identical to the one passed in the events.
- The catalog feed must contain all or at least most of your apps’ products for Retail apps, and hotels/airline routes for Travel apps.
- Recommended image resolution is 300x300 pixels to 400x400 pixels.
Testing Process
Once all events and postbacks have been implemented, you should contact your Criteo representative to begin the testing phase. Criteo requires the following elements:- App build to test the collection of events on Criteo side.
- If testing remotely, the GAID of the test device.
- (For Retargeting) Deeplink and Universal Link examples — homepage & product details page.