

Setting up an authorization code application
Step 1. Authorization Code Setup
Creating an authorization code app
- Once you have logged in to the Criteo Partners Portal, create a new App by clicking on ➕ button in the My apps section

1.1. Create app
- App details
- Provide your app name and description. You can also provide an optional image to identify your application. On your App page, you will be able to define the scope of your application and the OAuth parameters. Please see this page to see more details on how to define your app scope.
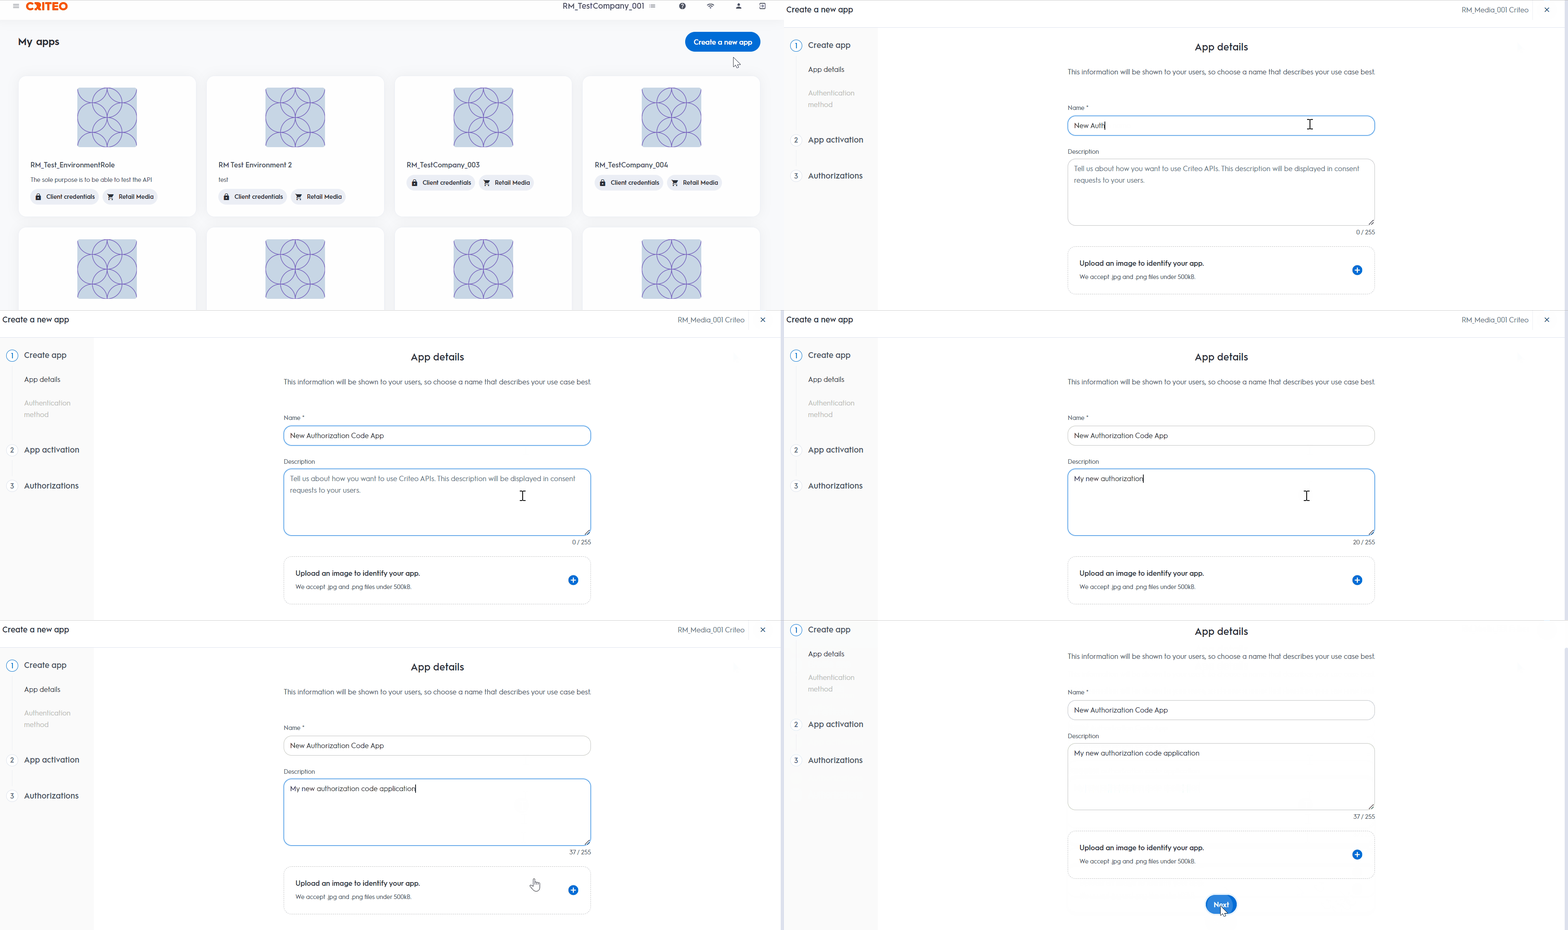
- Provide your app name and description. You can also provide an optional image to identify your application. On your App page, you will be able to define the scope of your application and the OAuth parameters. Please see this page to see more details on how to define your app scope.
- Authentication method
- Select your app authentication method. You will have the option to select Client Credentials or Authorization Code. To decide which option is best for your organization, review our OAuth implementation guide.
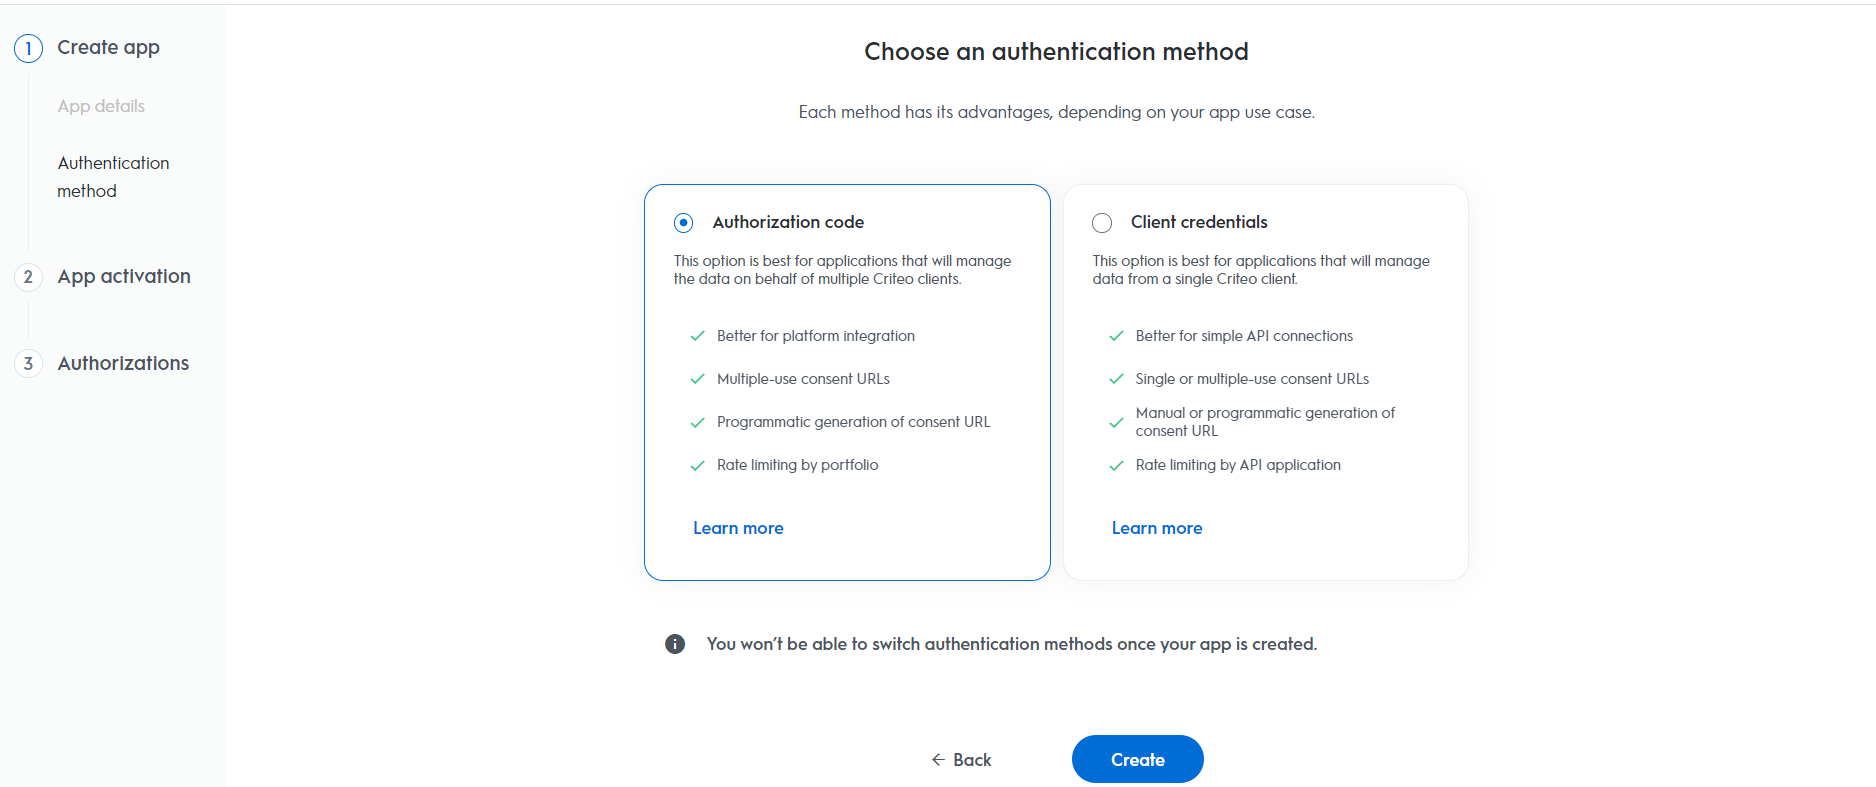
- Select your app authentication method. You will have the option to select Client Credentials or Authorization Code. To decide which option is best for your organization, review our OAuth implementation guide.
1.2. App activation
- Service
- Select which Criteo service you want to use your API application with. Chose C-Growth for marketing solutions or C-Max for retail media
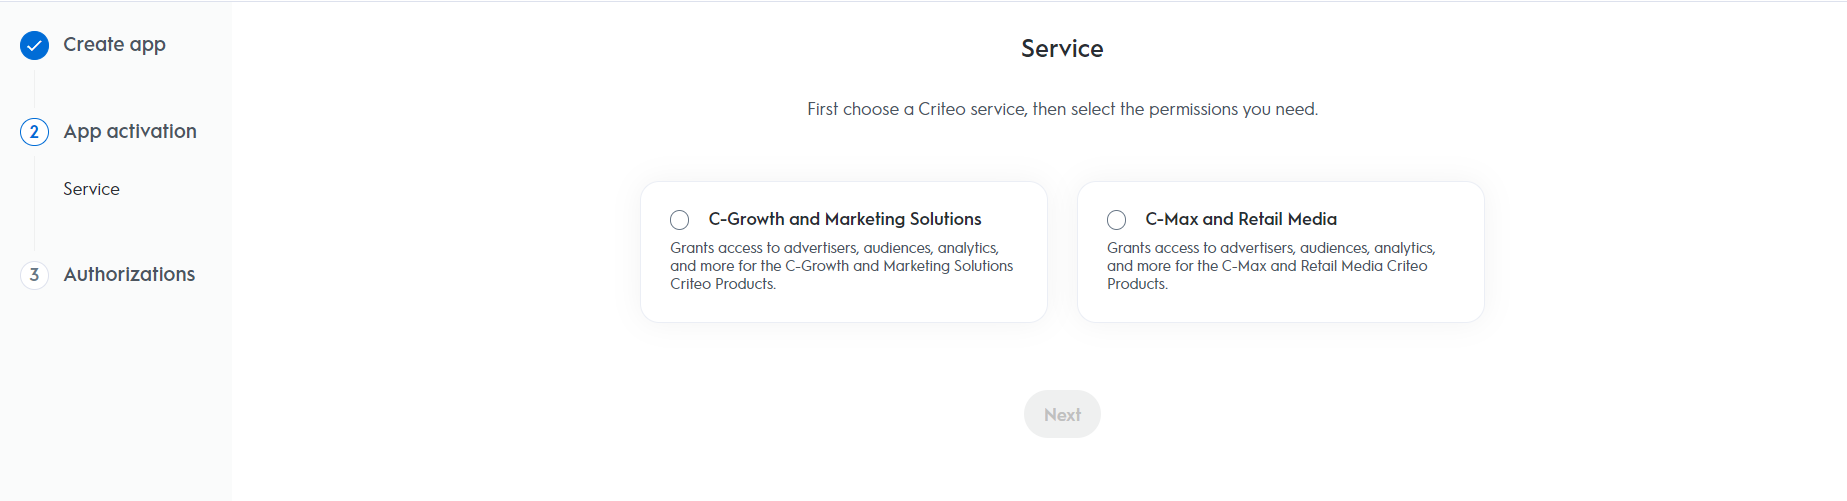
- Select which Criteo service you want to use your API application with. Chose C-Growth for marketing solutions or C-Max for retail media
1.3. Authorizations
- Domains
- Select the domains to choose which permission access your application will need
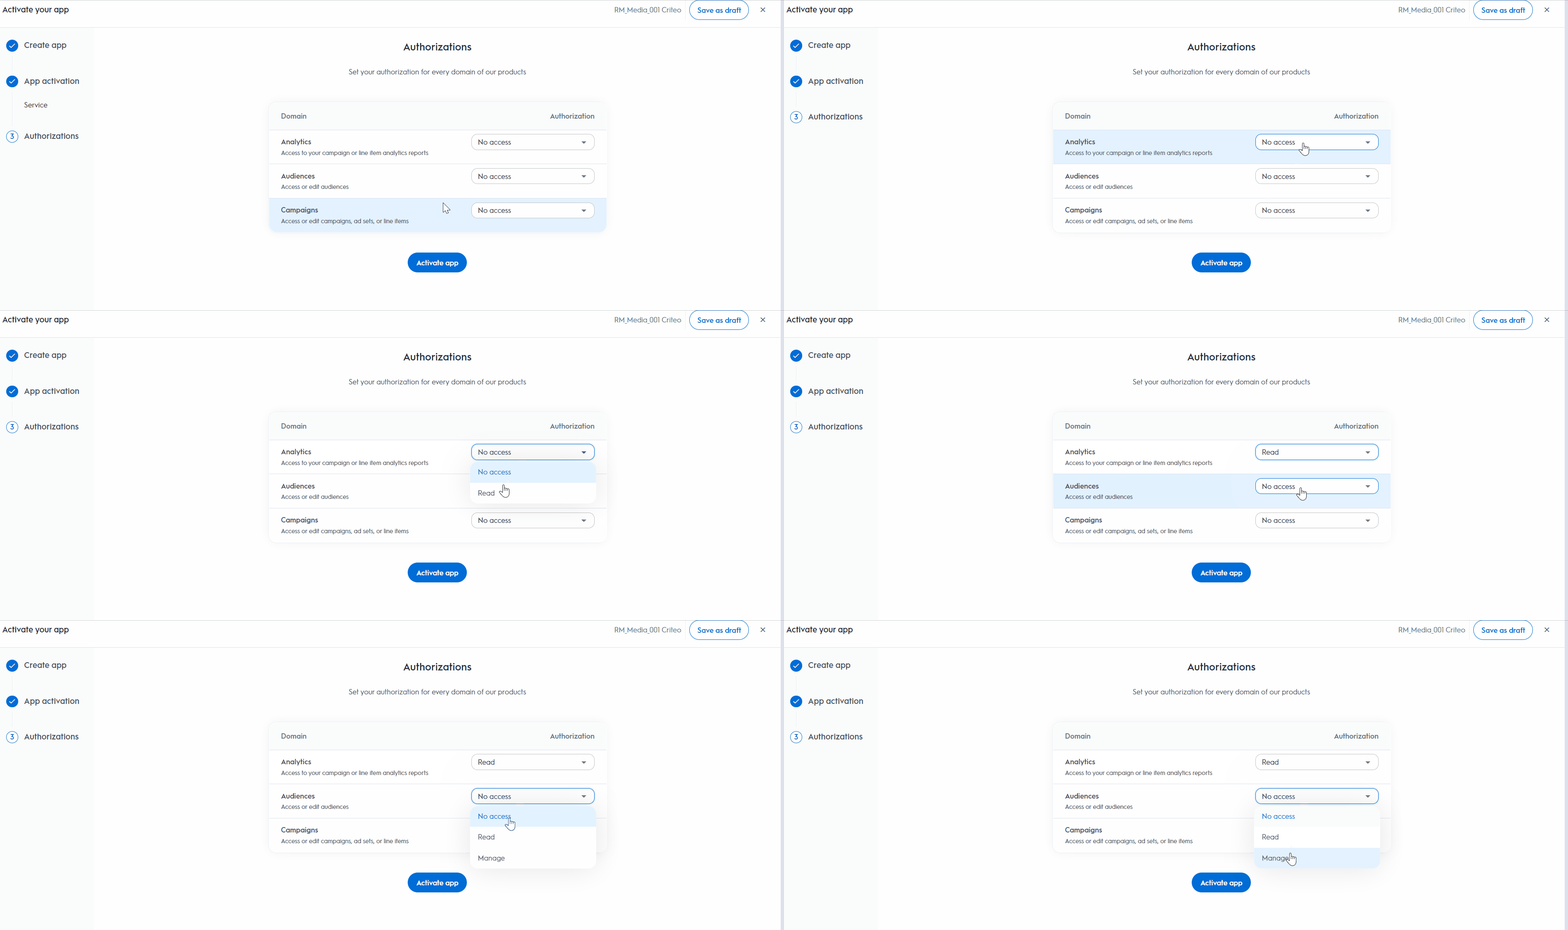
- Select the domains to choose which permission access your application will need

Step 2. Set Up Your OAuth Parameters
Once you have defined the scope of your application, you will be able to set what you need for the authorization code workflow
You can now publish the app, and start an authorization code workflow.
2.1. - Consent URL Creation
Once you have defined the parameters of your App you can start implementing your authorization code flow. Consent URL- To request access to a user’s data, you will create a Consent link (to be sent to the user or implemented through a button in your platform that will redirect the user to the link) with the following structure and parameters:
Authorization Code v. Client Credentials Consent URLsIf you are familiar with the Client Credentials workflow, you will notice that in the partner portal you won’t see the “Generate Consent URL” button. This is because with authorization code workflow you are required to provide the redirect URI which is unique to your organization. So these will need to be configured within your workflow.
- The Consent link will direct your user to Criteo Consent page will look like this example:
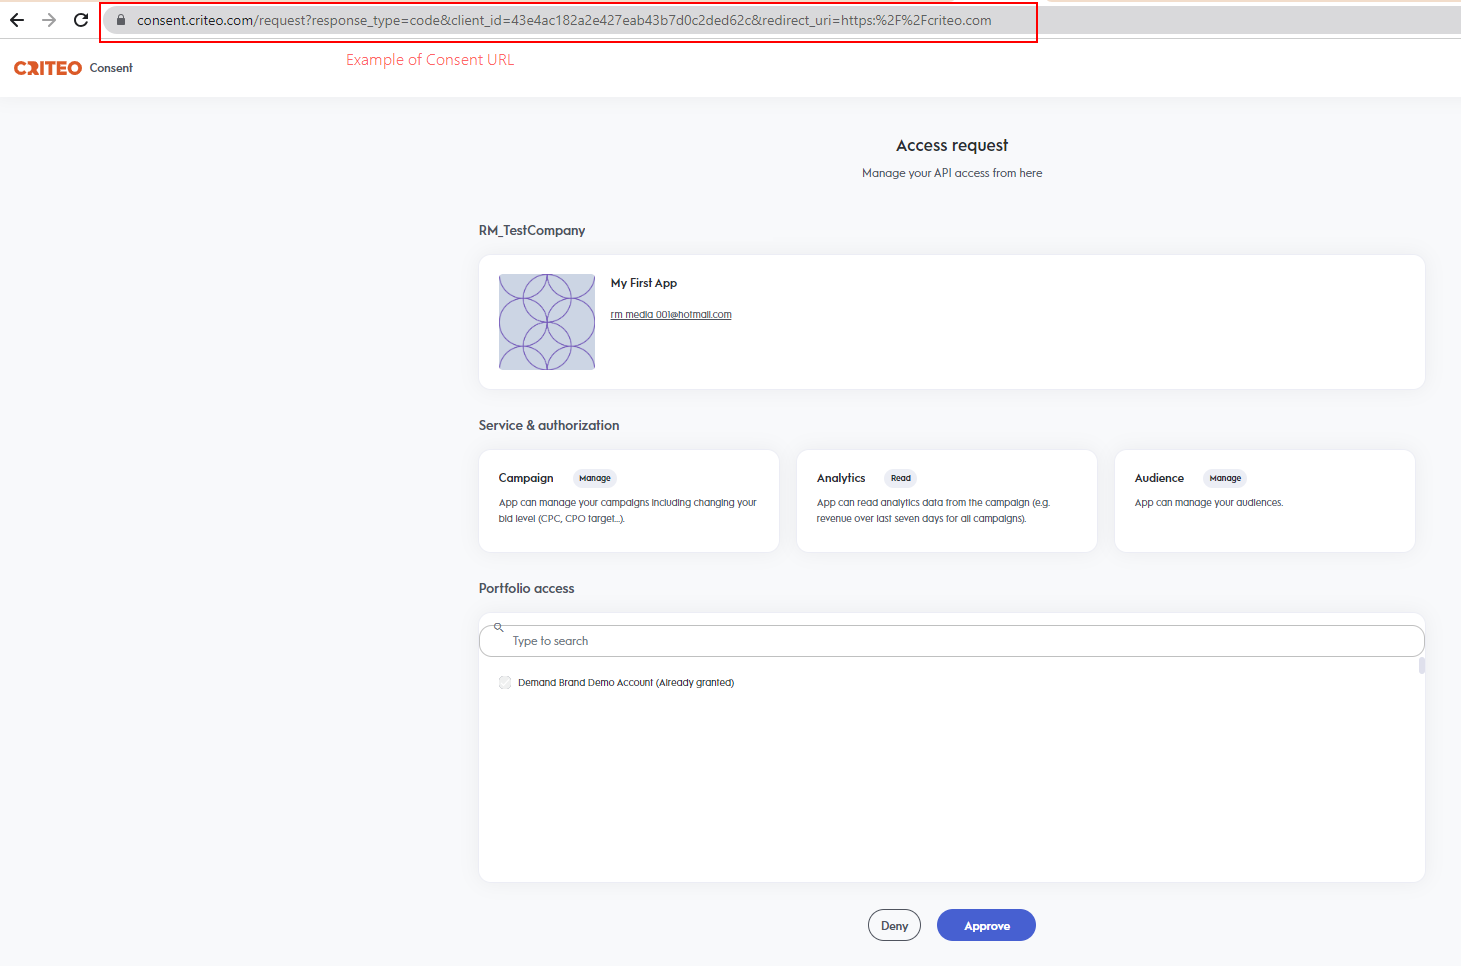
- The user will be able to choose what advertiser(s) from their portfolio they want to give access to.
- The user will approve the request by clicking on “Approve”
NotesA consent request is displayed to a user in all cases except in the following:
- The
client_iddoes not match any published API app. - The
redirect_uriis not authorized (e.g not accessible from public network) - An unexpected error occurred in our backend.
2.2. - Redirection and Access Code
Once the user has completed the Consent Delegation flow, we redirect your user to the following URL:redirect_uri and the following query parameters:
If the consent request is denied, we redirect to the same
redirect-uri but with an ‘error’ query parameter instead of a ‘code’.
Step 3. Exchanging Access Code For Access Token
Now that you have an authorization code, you can trade it for an access token by making the following POST call. Your call will need to be setup this way:
The response from Criteo API will be the following:
3.1. - Using Refresh Token
When an access token is close to expiration, you can get a new one using a refresh token via the following request:
The response will be the same as when issuing an access token
Demo
Below you can find a code for a demo application in NodeJS that uses Express JS framework.How to run the demo?
- Run
npm install - Connect to the developer portal and create an app according to the instructions above
- Create an “Authorization code” app.
- Generate app credentials and enter the client_id and client_secret in index.js.
- Register “http://localhost:3000/criteo-auth/callback” as the redirect URI.
- Run
npm run start - Open http://localhost:3000
FAQWhat happens if my
client_id and client_secret are compromised? You will need to delete the set of credentials in the App page and create a new one. You will need to request access again to your users.