Steps
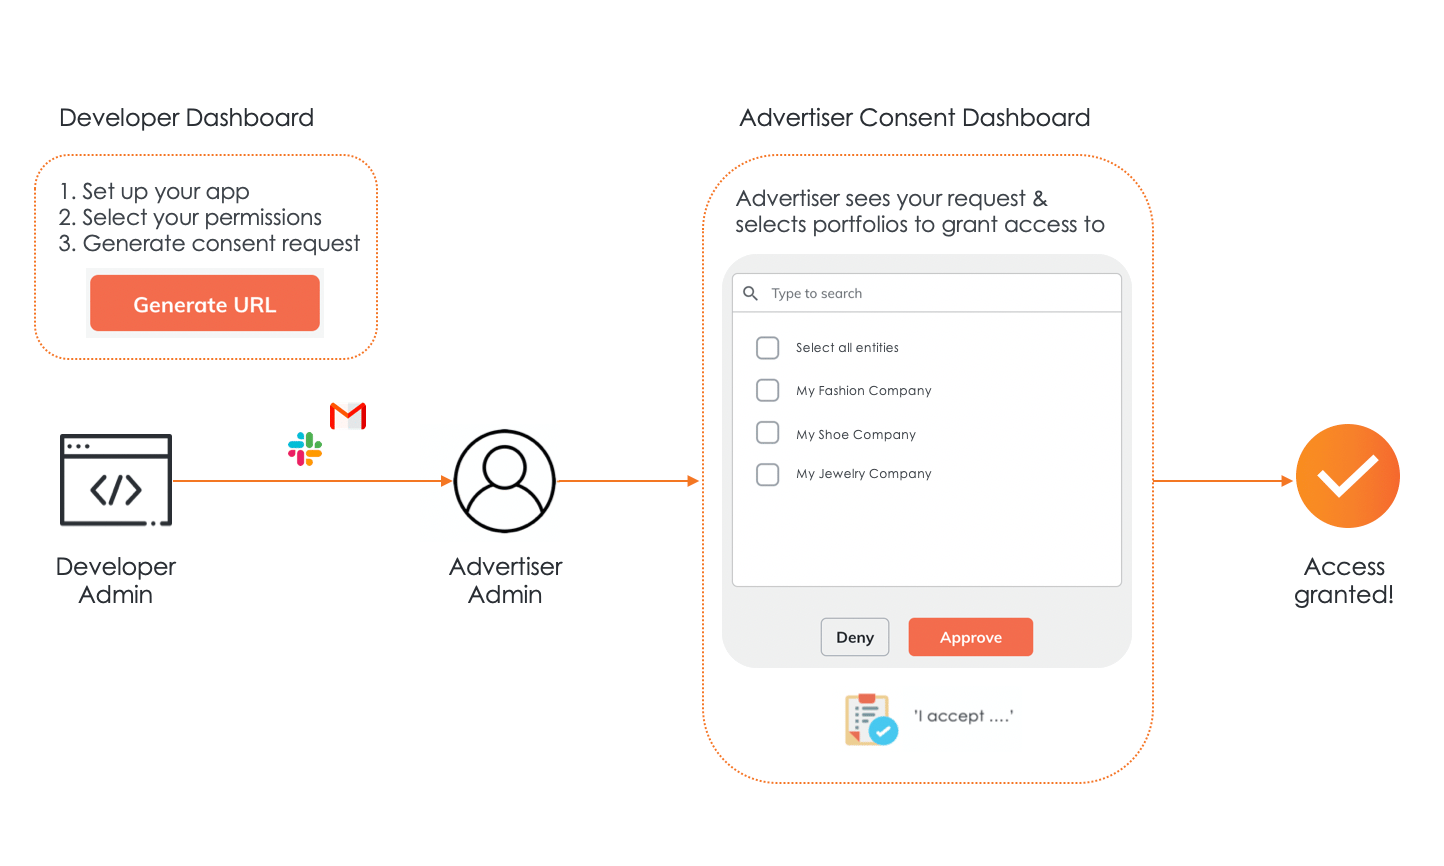
- On the Developer Dashboard, the app developer sets up the app, picking a name, description, and logo
- The app developer selects which permissions the app will need access to
- The app developer generates a URL to share with an advertiser. Note: Once this URL is generated, the app name, description and scope cannot be changed
- The app developer shares the link with the advertiser
- The advertiser is directed to the Consent Dashboard and prompts the advertiser to login if required
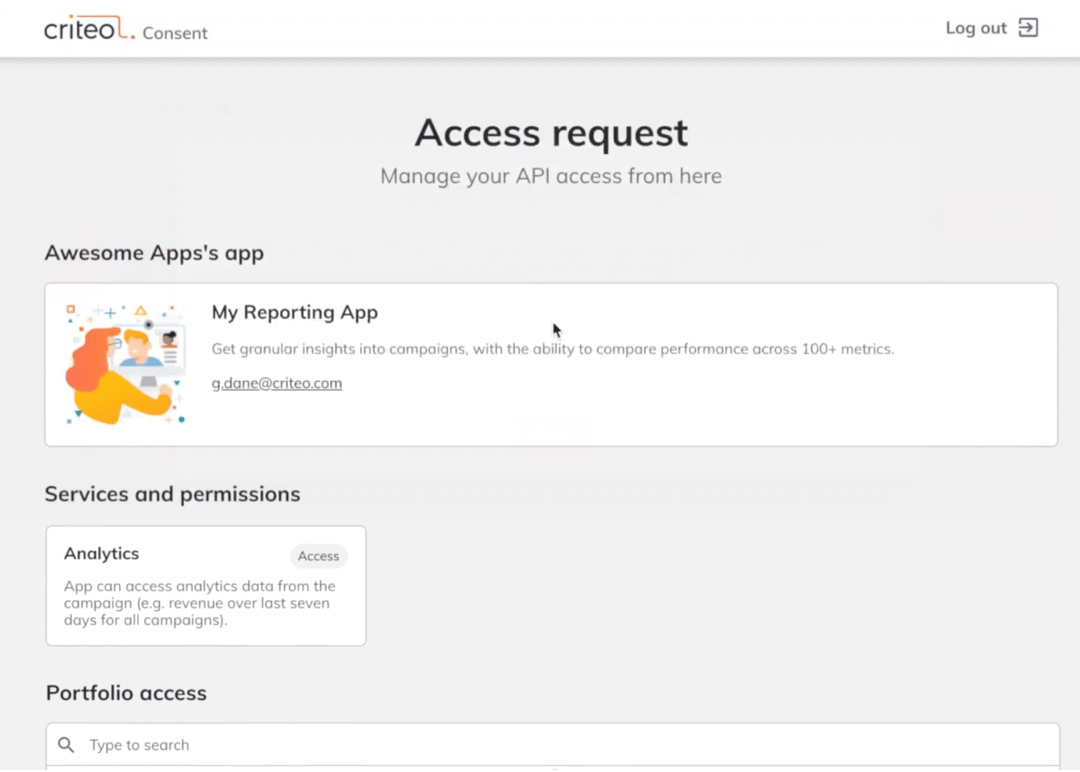
- The advertiser sees the authorization request, which has information about the app and the requested permissions
- The advertiser decides which portfolios to grant or deny access to. Only Advertiser Admin can grant or deny access to an application.
- The app is now able to send calls leveraging that advertiser’s account
Types of permissions
Each app will request different permissions, based on its purpose. These permissions will be tied to different aspects of campaigns, such as Audiences, Budgets, Creatives, or Analytics. There are two types of permissions that an app might request. Read-only: These permissions request access to read an advertiser’s data or campaign details. They can only pull information; they do not modify a campaign in any way. An example would be an app that reads an advertiser’s data to create campaign reports. Manage: These permissions allow an app to make changes to an advertisers’ campaign, ad set, or ad. An example would be an app to automate setting CPCs for campaigns or uploading a Contact List.Granting access
When an advertiser receives an authorization request, they will be redirected to the Consent Dashboard.