- ✔ To-do: Steps that are required to perform a certain task or set up a part of your app
- 💡 Info: Information that is not critical for the process, but will help you understand the context or clarify specific steps.
- 🚨Warning: Things to be aware of throughout the process, as they might involve additional implementation effort or incur certain risks
Getting familiar with Criteo API and products
- ✔ Learn more about Criteo API use cases: If you already know Criteo, read our Is the Criteo API for you? article. Get some inspiration from our use cases if you are not sure to use the Criteo API
- 💡 Learn more about Criteo: If you are new to Criteo, read our Criteo Marketing Solutions for API users (if you are an Advertiser or an Agency) or our Criteo Publishers for API users [Coming soon] (if you are an inventory provider) to learn more about Criteo API capabilities
1. Getting started with access
- ✔ Create a Criteo partner account
- ✔ Create your organization once you have created your developer Criteo account
“My apps” dashboard will be empty for the newly created organizations, with the app creator wizard allowing you to create a new application (see the next section of the tutorial).
- 💡 Creating an Organization is mandatory for anyone who wishes to own the API connector.
- 💡 If you want to modify your Account, see our article Managing my partner account
- 💡 If you want to modify your Organization, see our article Managing my organization
2. Learning how to use Criteo endpoints
- ✔ Create an app
- ✔ Get your API credentials once your app is created. Start by creating a set of credentials by clicking on generate and downloading a new key. This will create a new set of credentials (API Key and API Secret)
- 💡 You will be limited to five API credentials for an app (for ex. one for production, one for troubleshooting, and three others for any other use cases you can imagine)
- 💡 For more details about how to edit and delete credentials, see the Create your app
- 💡 We recommend that you generate one additional key for debugging purposes. Upon request, this debug key should be generated or shared with your Criteo representative. Doing so will accelerate troubleshooting if you encounter difficulties using the Criteo API.
- 🚨 The API Secret will be available in the file automatically downloaded when creating a set of credentials. Please keep it safe, as it will be the only time we will be able to share it with you!
3. Define your app scope
- ✔ Select the services you would like to access through your app (Marketing Solutions, Retail Media, or Publisher). Once you have chosen a Service, click save. This action cannot be undone
- 🚨 Once you click on save, you won’t be able to switch between Marketing Solutions, Retail Media, or Publishers any longer. So please choose carefully (In case you made a mistake, don’t worry! You can create a new app 😉)
- ✔ Select the authorizations you would need for your app. Click on the Save button to save your authorization selection
- 💡 You can update the authorizations as many times as you want before validating your app through the Generate consent link button
4. Validate your app and generate a consent URL
- ✔ Scroll to the top of the page to complete your app creation by clicking on Generate & Copy URL. This will generate a consent link you can share with an advertiser, brand, or publisher to obtain authorization to access their assets.
- 🚨 Changing the name, description, image, or app scope will no longer be available after the first URL creation
- 💡 You can generate as many URLs as you want, and each URL can only be used once
5. Start using your API connection
- ✔ Share your consent URL by email, Slack, or any other means to your advertiser, brand, or publisher.
- ✔ Once they click the link, they will be redirected to the Criteo Consent Portal, where they can provide you with the requested authorization levels for the accounts in their portfolio (more details on step 6 below).
- ✔ Call the portfolio endpoint with your credentials to confirm you now have access to the accounts.
- 💡 You will then be able to use the domains in your scope for those advertisers/brands/publishers and start using Criteo APIs! 🎉
6. Accept consent request - only for advertisers/brands/publishers
This section of the guide is intended only for the people who have an account administrator role for their advertiser, brand, or publisher.Click on the link shared by the application developer. You will be taken to the consent portal as shown on the screenshot below:
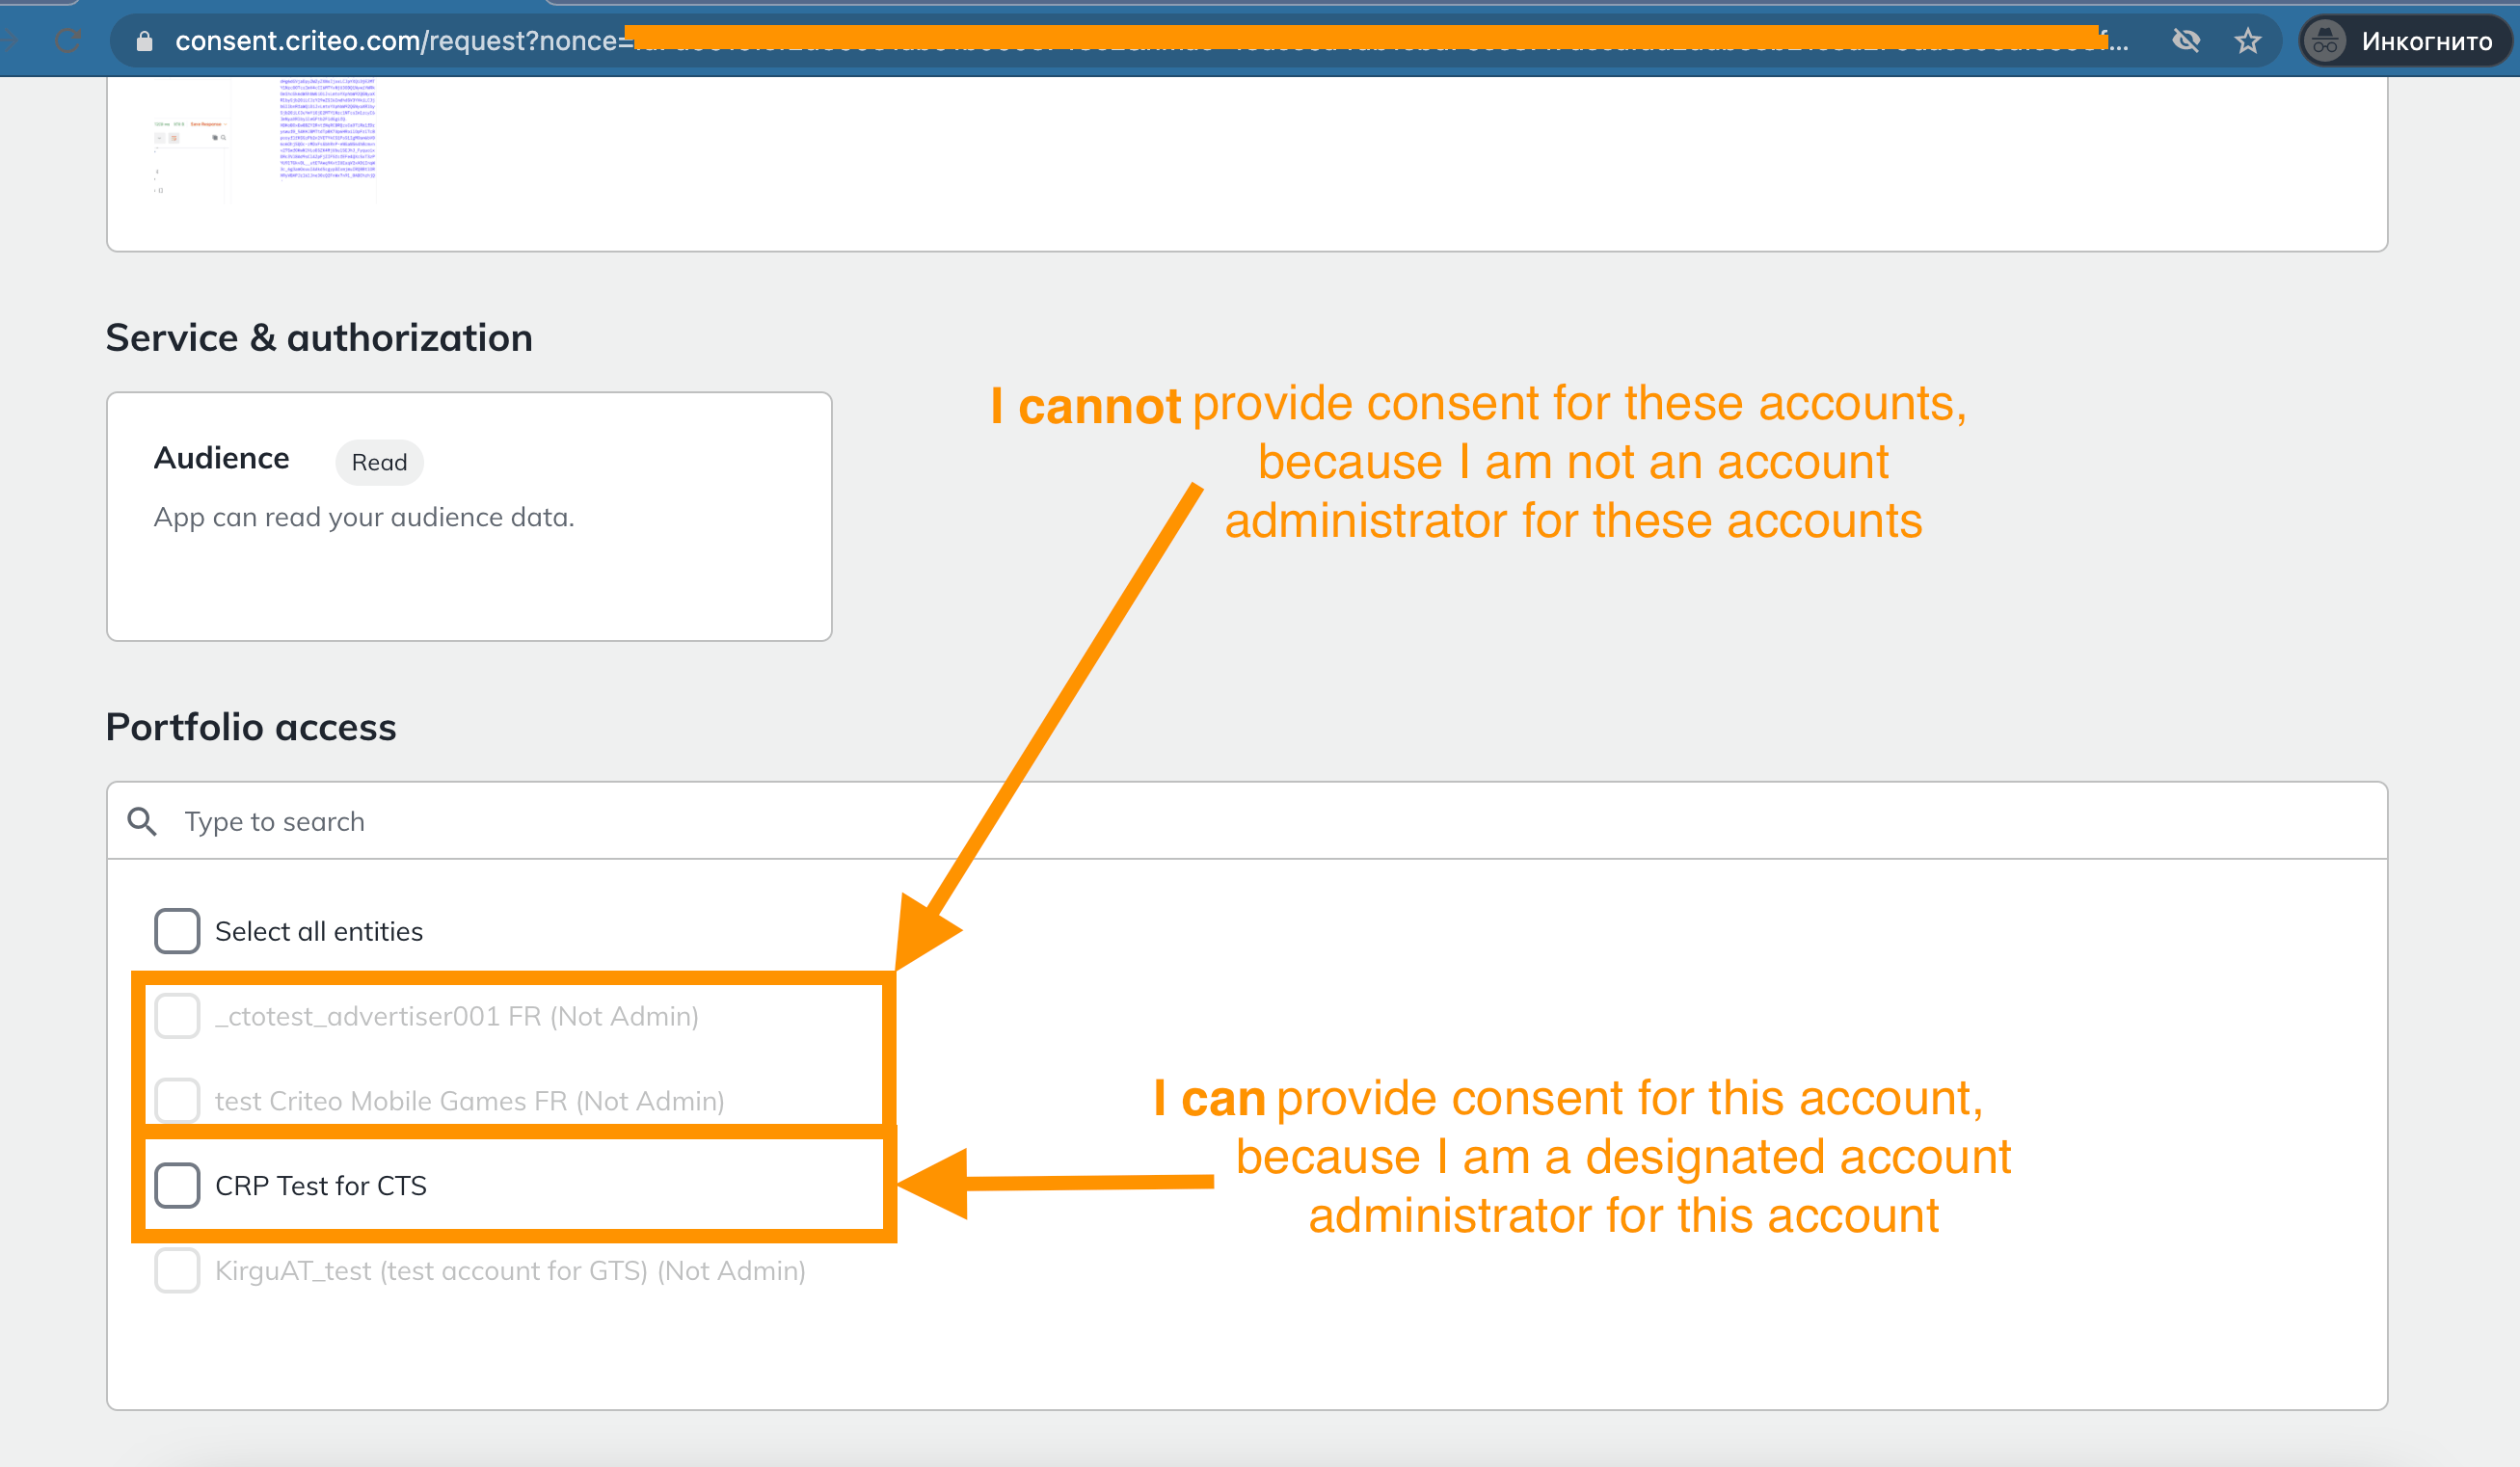
- 💡 Please note if you have a Business role on the account, you cannot provide consent to the account. Due to legal reasons, only an account administrator has the power to provide consent for their account.
- 💡 An account can have several administrators